HyperFrames 영상 편집 실습
HyperFrames 15초 영상 편집
- 정지 이미지 1장과 Higgsfield 5초 영상 1개를 준비합니다.
- HyperFrames에서 제목, 영상, 정지 이미지와 작업 기록을 배치합니다.
- FFmpeg로 1080×1920, 30fps, 약 15초 MP4를 출력합니다.
초록 사과 바구니 15초 영상
이 수업에서는 정지 이미지 한 장을 만든 뒤 같은 장면에 5초 움직임을 더하고 제목과 작업 기록을 붙여 15초 MP4 영상으로 편집합니다. 아래 영상은 수업에서 실제로 만든 완성본이며 이미지 1장과 영상 1건을 생성하는 데 29.5크레딧을 사용했습니다.
Higgsfield에 실제로 넣은 영상 프롬프트
위 15초 영상의 2~7초 구간은 Higgsfield의 Seedance 2.0에서 만들었습니다. 승인한 정지 이미지를 올리고 9:16, 720p, 5초, 무음, 1건을 선택한 뒤 아래 문장을 그대로 입력했습니다.
One continuous five-second shot. The camera makes a very slow, smooth push-in toward the basket. The loose edge of the linen cloth lifts and settles once in a faint indoor breeze. Late-afternoon sunlight drifts gently across the apples, and one narrow highlight travels along the glass carafe. The basket, exactly five apples, carafe, plate, table grain and vertical composition remain visually consistent throughout. Natural optical motion, stable geometry, restrained editorial pacing.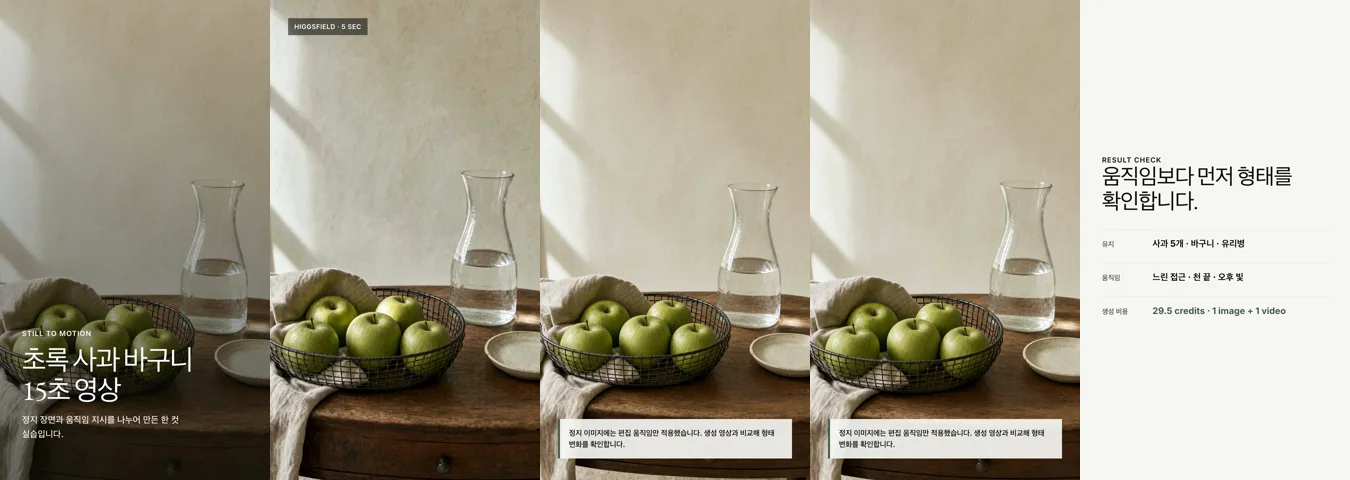
원문을 새 장면으로 바꾸는 방법
디어무이 게시물에서는 완성 이미지와 그 이미지를 만든 프롬프트가 한 쌍으로 이어집니다. 이 수업에서는 원문 문장을 복사하지 않고 새 레퍼런스를 장면, 구도, 재질, 조명, 색, 스타일, 촬영, 경계의 여덟 항목으로 나눠 읽습니다.
- 장면: 중심 대상과 화면에서 일어나는 일을 적습니다.
- 구도: 대상의 배치와 시선이 이동하는 순서를 적습니다.
- 재질: 표면, 소재와 사용 흔적을 적습니다.
- 조명: 빛의 원인과 방향, 그림자와 공기의 상태를 적습니다.
- 색과 스타일: 반복되는 색, 포인트 색, 대비, 입자와 선명도를 적습니다.
- 촬영: 카메라 높이와 거리, 초점이 놓인 곳을 적습니다.
- 경계: 만들지 말아야 할 글자, 상표, 사람과 새 물체를 적습니다.
각 항목은 화면에서 직접 확인한 관찰, 가능성은 있지만 확정할 수 없는 추론, 새 결과를 위해 자신이 정할 선택으로 다시 나눕니다. 장소, 촬영 시각, 카메라 기종과 렌즈 수치처럼 화면에서 확인할 수 없는 값은 관찰로 적지 않습니다.
카메라 값과 화면 결과를 함께 정합니다
디어무이 조리개 복습 게시물은 조리개 값을 배경 흐림과 앞뒤 선명도에 연결합니다. 2장 전체를 확인했으며, 게시물도 이 숫자가 절대값이 아니라고 밝힙니다. 실제 피사계 심도는 초점거리, 촬영 거리, 피사체와 배경의 거리, 센서 크기에 따라서도 달라지므로 아래 값부터 시험한 뒤 결과를 확인합니다.
| 시작할 조리개 값 | 화면에서 기대할 결과 | 먼저 시험할 장면 |
|---|---|---|
f/1.8–2.8 | 초점 범위가 얕고 배경이 많이 흐려집니다. | 인물, 한 개의 제품 |
f/4 | 주제를 분리하면서 주변 정보도 일부 남깁니다. | 음식, 제품, 일상 기록 |
f/5.6–8 | 여러 물체와 재질을 함께 읽기 쉽습니다. | 푸드 세트, 여러 제품, 실내 |
f/8–11 | 앞뒤 공간과 구조를 함께 선명하게 만들기 쉽습니다. | 풍경, 건축, 전체 기록 |
Nikon 조리개 안내와 Canon 피사계 심도 안내에서 같은 관계와 영향을 주는 조건을 다시 확인했습니다.
이미지와 영상 프롬프트를 쓰기 전에 아래 항목을 확인값, 권장값, 미확인으로 나눠 적습니다. 생성 도구가 숫자를 실제 조절 항목으로 지원하지 않으면 초점거리와 조리개는 화각·원근·피사계 심도로, 셔터는 움직임 흐림으로, ISO는 노이즈로, 화이트밸런스는 광원의 색과 중성색 표현으로 바꿔 적습니다.
붙여넣기 프롬프트[카메라 값] - 값의 상태: [확인값 / 권장값 / 미확인] - 카메라 높이·거리·각도: - 35mm 환산 초점거리와 화면 효과: - 조리개와 피사계 심도: - 셔터와 움…
[카메라 값]
- 값의 상태: [확인값 / 권장값 / 미확인]
- 카메라 높이·거리·각도:
- 35mm 환산 초점거리와 화면 효과:
- 조리개와 피사계 심도:
- 셔터와 움직임 표현:
- ISO와 노이즈:
- 화이트밸런스와 광원 색:
- 초점 대상·초점면:
- 영상의 카메라 움직임 한 가지:
실제 영상 촬영에서는 24fps에 약 1/50초, 30fps에 약 1/60초를 자연스러운 움직임 흐림의 출발값으로 사용할 수 있습니다. Nikon HDSLR 영상 설정 안내에서 이 관계를 확인했습니다. 생성 서비스가 프레임 속도와 셔터를 받지 않으면 숫자를 넣지 않고 natural motion blur처럼 화면에서 확인할 결과를 씁니다.
시작 전 준비
- 이미지 생성 도구와 Higgsfield 계정을 엽니다.
- S3 이미지에서 영상 만들기 수업을 한 번 진행하고 승인한 생성 경로를 준비합니다.
- HyperFrames에서 새 프로젝트를 만들 수 있는지 확인합니다.
- FFmpeg와 FFprobe가 설치된 터미널을 엽니다. 터미널은 글자 명령으로 프로그램을 실행하는 화면입니다.
- 생성 화면에서 예상 크레딧과 현재 잔액을 확인합니다.
이미지와 영상 생성은 크레딧을 사용합니다. 생성 버튼을 누르기 전에 만들 건수, 예상 비용, 지금까지 쓴 비용, 남은 잔액을 확인하고 한 건씩 진행합니다. 추가 생성이 필요하면 새 건수와 비용을 다시 확인합니다.
한 가지 방법으로 따라하기
1. 새 레퍼런스를 여덟 항목으로 나눕니다
새로 분석할 레퍼런스 이미지와 원문 프롬프트를 대화에 넣은 뒤 아래 요청문을 붙여넣습니다. 원문 게시물을 직접 열 수 없는 도구에서는 13번 이미지를 첨부하고 14번 프롬프트를 함께 입력합니다.
붙여넣기 프롬프트첨부한 이미지는 새 이미지 프롬프트를 만들기 위한 레퍼런스입니다. 아직 최종 프롬프트를 쓰지 말고 다음 여덟 항목으로 이미지를 나눠 주세요. 1. 장면: 중심 대상과 행동…
첨부한 이미지는 새 이미지 프롬프트를 만들기 위한 레퍼런스입니다.

아직 최종 프롬프트를 쓰지 말고 다음 여덟 항목으로 이미지를 나눠 주세요.
1. 장면: 중심 대상과 행동
2. 구도: 대상의 배치와 시선의 흐름
3. 재질: 표면, 소재, 사용 흔적
4. 조명: 빛의 원인과 방향, 그림자, 공기의 상태
5. 색: 반복되는 색과 작은 포인트 색
6. 스타일: 대비, 입자, 선명도, 전체 분위기
7. 촬영: 카메라 높이와 거리, 초점이 놓인 곳, 화면에서 보이는 화각·원근·피사계 심도·움직임 흐림·노이즈
8. 경계: 만들지 말아야 할 글자, 상표, 사람, 새 물체

각 항목을 관찰, 추론, 선택으로 나눠 표로 작성해 주세요.
- 관찰: 화면에서 직접 확인한 사실
- 추론: 가능성은 있지만 화면만으로 확정할 수 없는 내용
- 선택: 새 결과를 위해 제가 정해야 할 값

장소, 시간대, 카메라 기종과 촬영값은 확인되지 않으면 관찰로 단정하지 마세요. 초점거리, 조리개, 셔터, ISO와 화이트밸런스는 확인값, 화면 효과를 다시 만들기 위한 권장값, 미확인 가운데 하나로 표시해 주세요.
모호한 항목은 질문으로 남기고, 제가 답하기 전에는 최종 프롬프트를 쓰거나 이미지를 생성하지 마세요.
분석표가 나오면 새 장면에 사용할 값을 적고 아래 요청문을 이어서 붙여넣습니다. 이번 예시에서는 초록 사과 5개, 낮은 타원형 철제 바구니, 테이블 높이 카메라, 왼쪽에서 들어오는 빛과 제목을 넣을 상단 여백을 선택했습니다.
붙여넣기 프롬프트방금 작성한 분석표에서 관찰과 제가 확정한 선택만 사용해 이미지 생성용 최종 프롬프트를 작성해 주세요. 새 장면에서 유지할 값: - 중심 대상과 수량: [대상과 정확한 수량…
방금 작성한 분석표에서 관찰과 제가 확정한 선택만 사용해 이미지 생성용 최종 프롬프트를 작성해 주세요.

새 장면에서 유지할 값:
- 중심 대상과 수량: [대상과 정확한 수량]
- 용기와 배치: [형태, 재질, 배치]
- 주변 재료: [천, 유리, 나무처럼 화면에 필요한 재료]
- 카메라: [높이, 거리, 각도, 초점]
- 초점거리와 화면 효과: [화각, 원근 압축, 주변부 왜곡]
- 조리개와 피사계 심도: [초점 대상, 선명한 범위, 배경 흐림]
- 셔터와 움직임 표현: [멈춘 움직임 또는 자연스러운 흐림]
- ISO와 노이즈: [깨끗한 표면 또는 의도한 입자]
- 화이트밸런스: [광원 색과 중성으로 남길 흰색·제품색]
- 빛: [광원, 방향, 그림자]
- 색과 분위기: [주요 색, 채도, 사진의 분위기]
- 반드시 사실적으로 보여야 할 부분: [수량, 접힘, 반사, 표면 흔적]
- 만들지 말아야 할 부분: [글자, 상표, 사람, 새 물체, 왜곡]
- 화면 비율: [예: 세로 9:16]

프롬프트는 다음 순서로 한 개의 영어 코드 블록에 작성해 주세요.
장면과 대상 → 구도와 카메라 → 재질과 물리적 흔적 → 빛과 그림자 → 색과 스타일 → 유지 조건과 제외 조건 → 화면 비율

레퍼런스에 없는 장소, 촬영 시각, 카메라 기종과 렌즈 수치를 임의로 보태지 마세요. 추상적인 감성어만 쓰지 말고 화면에서 확인할 수 있는 대상, 위치, 재질, 빛과 물리적 흔적으로 풀어 써 주세요. 최종 영어 프롬프트 뒤에는 생성 전에 확인할 항목을 한국어 다섯 줄로 적어 주세요.
2. 정지 이미지 프롬프트를 입력합니다
이미지 생성 화면에 아래 프롬프트를 붙여넣고 9:16, 2K, high, 1장을 선택합니다. 화면에 보이는 예상 비용을 기록한 뒤 한 장만 생성합니다.
Editorial still-life photograph for a quiet home dining story. A low oval dark steel wire basket holding exactly five green apples sits on a warm walnut table. An off-white linen cloth folds naturally through one side of the basket; beside it are a clear glass carafe and a small ivory ceramic plate. Cream lime-plaster wall with generous upper negative space. Camera at table height, 50 mm lens, vertical close-medium composition, basket in the lower third, crisp focus on apples and wire texture, subtle depth of field. Soft late-afternoon side light enters from the left, and gentle shadows fall to the right. Color palette: apple green #7E9B55, warm walnut brown #6B4634, oatmeal linen #D8CDBB, clear glass, ivory #F1EBDD, charcoal steel #343632. Natural editorial realism, restrained styling, tactile materials, quiet lived-in mood. AR 9:16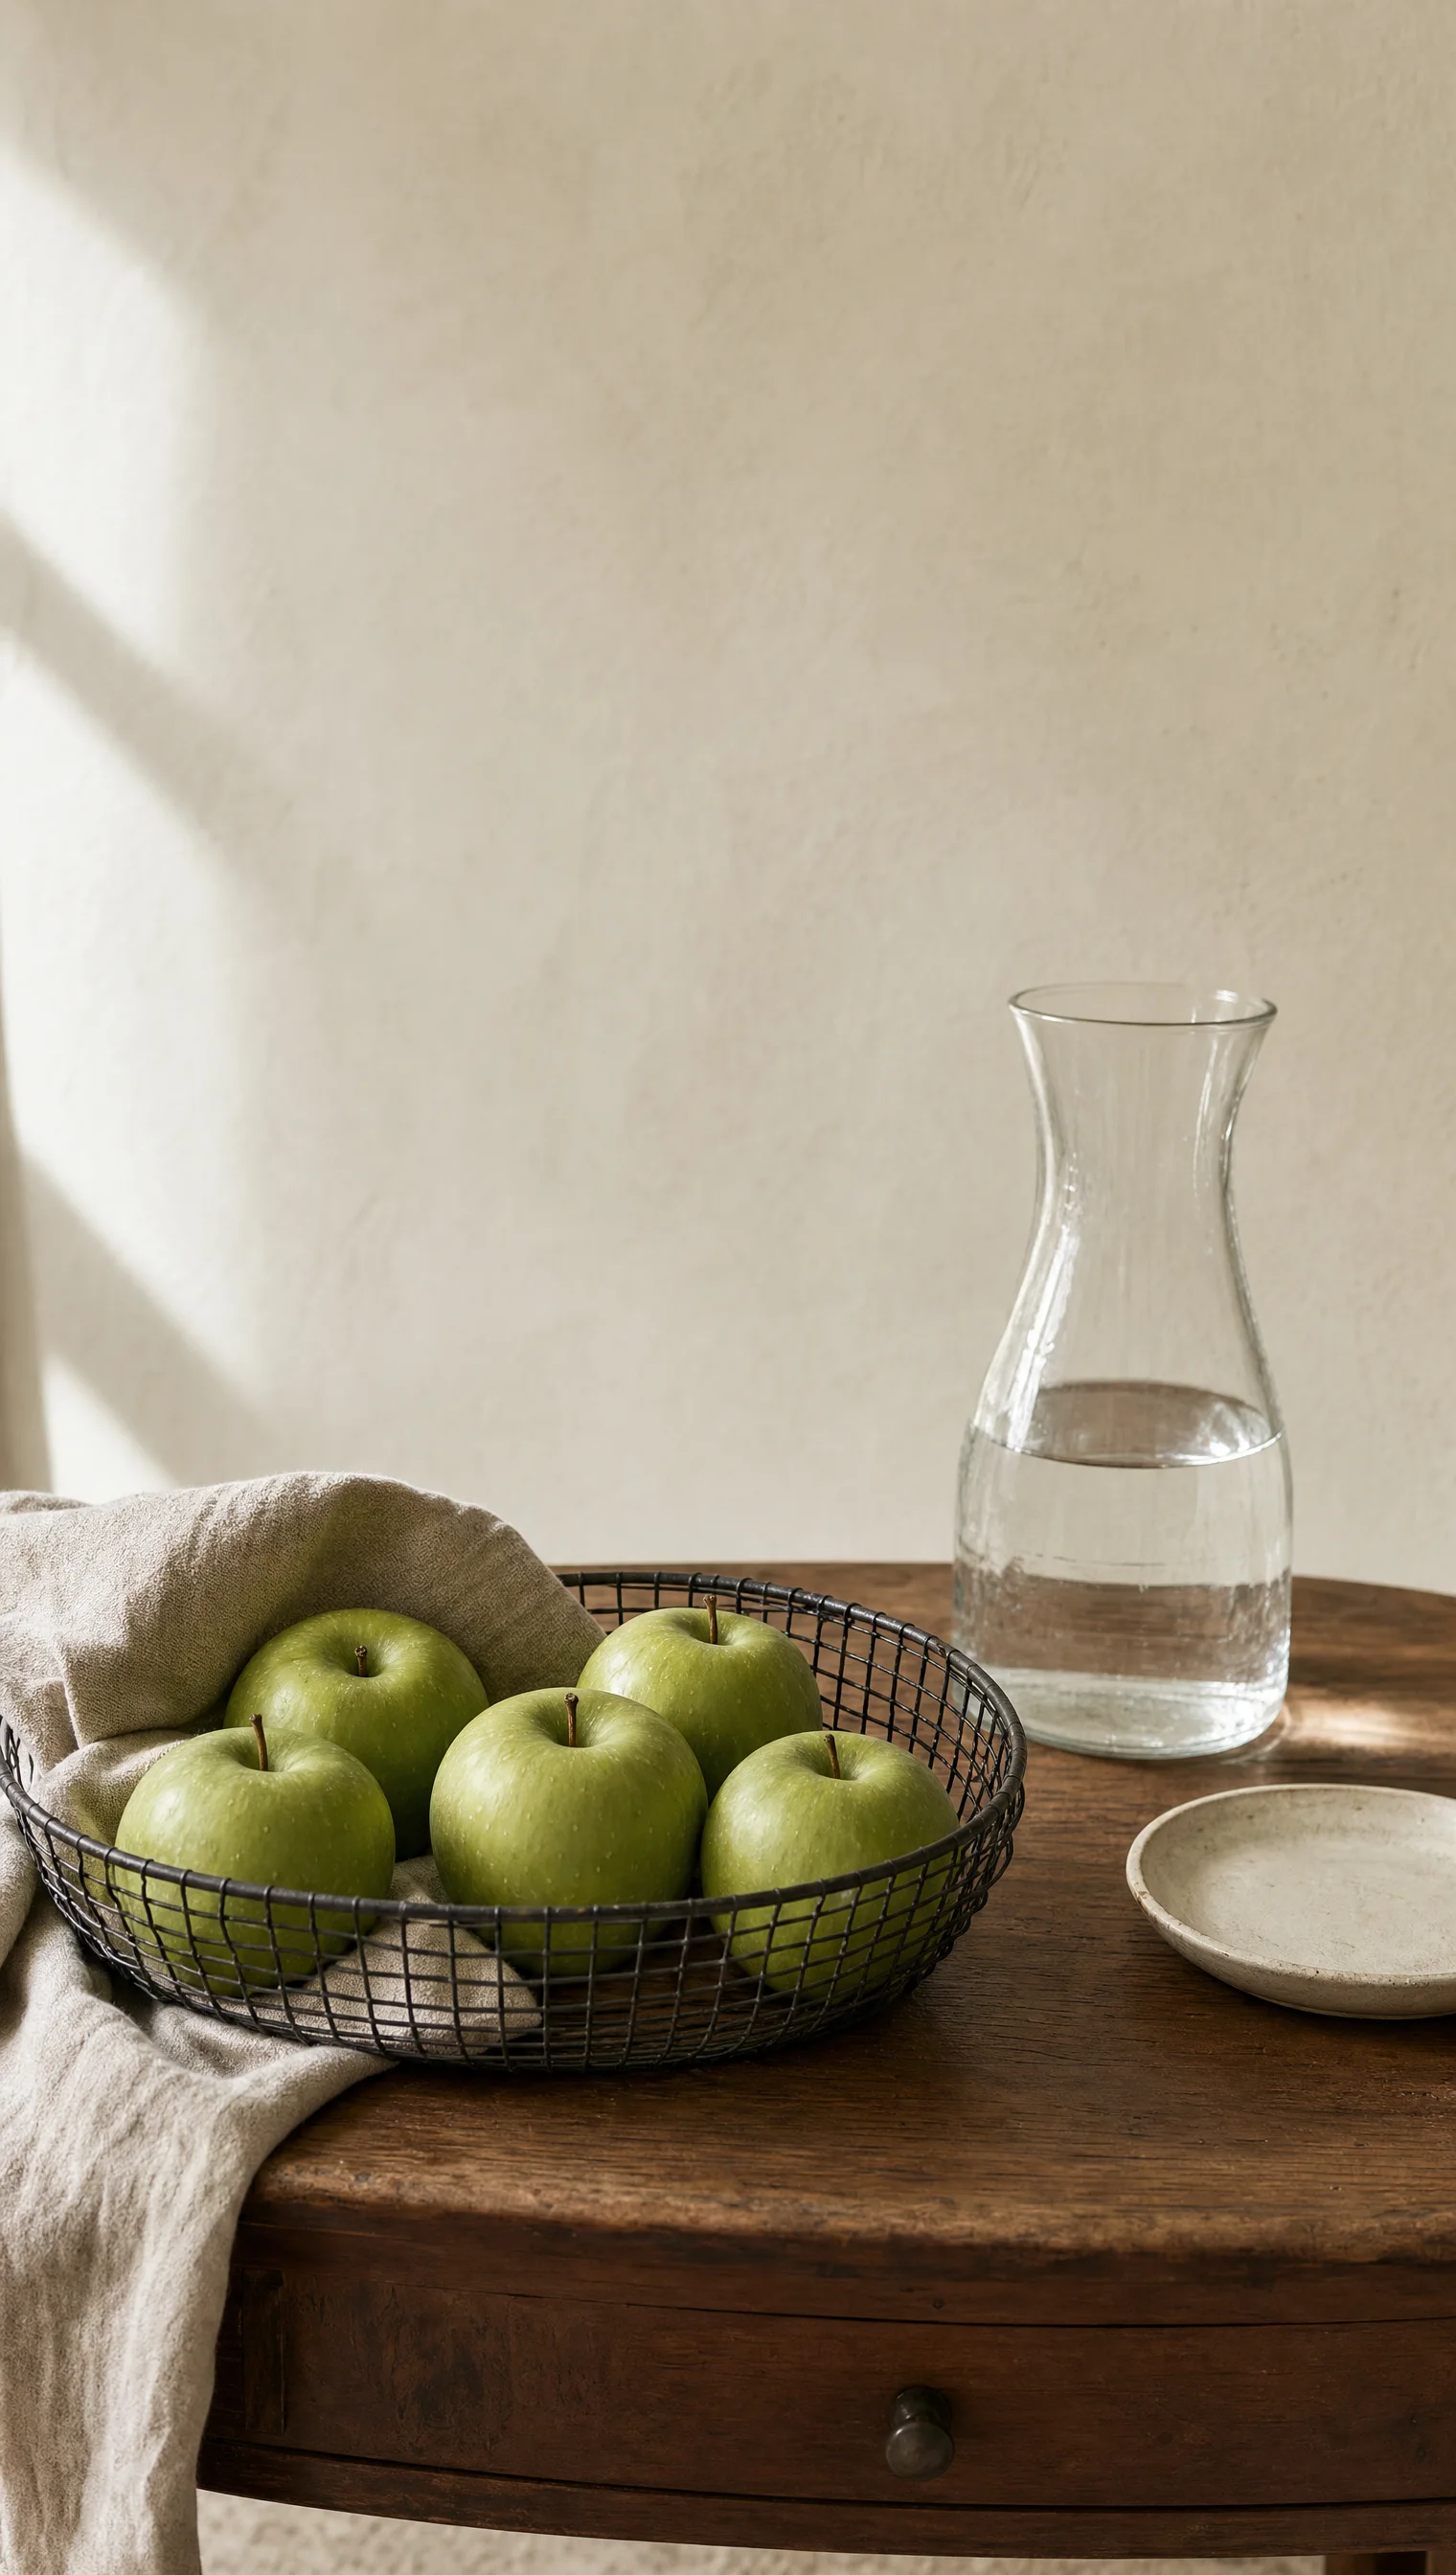
이번 실행에서는 GPT Image 2로 한 장을 만들었고 7크레딧을 사용했습니다. 수량이나 형태가 다르면 바로 다시 만들지 않고 틀린 항목 한두 개만 아래와 같이 수정합니다.
붙여넣기 프롬프트Edit the existing image while preserving the overall composition, camera angle, lighting directi…
Edit the existing image while preserving the overall composition, camera angle, lighting direction, and color palette.

Required corrections:
1. Keep exactly five green apples. Remove any additional fruit without moving the remaining apples more than necessary.
2. Restore the container as a low oval black wire basket with thin, evenly spaced metal wires.
3. Keep the off-white linen cloth. Make the folds physically believable and remove any duplicated fabric edges.

Do not introduce new objects, text, logos, hands, people, leaves, or flowers.
생성된 이미지를 대화에 올리고 아래 요청문을 붙여넣으면 새 이미지를 만들기 전에 수정할 부분을 정리할 수 있습니다.
붙여넣기 프롬프트첨부한 생성 이미지를 아래 기준으로 검수해 주세요. 기준: 1. 중심 대상의 수량과 형태가 프롬프트와 같은가 2. 용기의 구조와 재질이 물리적으로 자연스러운가 3. 천의 접…
첨부한 생성 이미지를 아래 기준으로 검수해 주세요.

기준:
1. 중심 대상의 수량과 형태가 프롬프트와 같은가
2. 용기의 구조와 재질이 물리적으로 자연스러운가
3. 천의 접힘, 유리의 반사, 나무결과 그림자가 서로 충돌하지 않는가
4. 카메라 높이, 거리, 초점과 상단 여백이 계획과 같은가
5. 빛의 방향과 그림자 방향이 일치하는가
6. 글자, 상표, 사람, 새 물체와 중복된 형태가 생기지 않았는가

먼저 기준별로 통과, 수정 필요, 확인 어려움 가운데 하나를 표시하고 이미지에서 확인한 근거를 한 줄씩 적어 주세요. 이어서 가장 영향이 큰 오류 한두 개만 고치는 영어 수정 프롬프트를 코드 블록 하나로 작성해 주세요. 이미 맞는 구도, 카메라, 빛, 색과 물체의 위치는 유지하고 새 물체를 추가하지 마세요.
3. 정지 이미지에 5초 움직임을 더합니다
Higgsfield의 이미지에서 영상 만들기 화면에 승인한 정지 이미지를 올립니다. 프롬프트를 쓰기 전에 기준 화면과 끝 상태를 정합니다.
| 움직임 설계법 | 기준 화면 | 주된 움직임 | 끝 상태 |
|---|---|---|---|
| 작은 움직임이 돌아오는 영상 | 첫 장면 | 물체 하나가 움직였다가 돌아옵니다. | 첫 장면과 자연스럽게 이어집니다. |
| 목표 장면에 도착하는 영상 | 마지막 장면 | 대상을 정해 둔 위치로 옮깁니다. | 마지막 장면의 배치와 일치합니다. |
| 효과가 생겼다가 가라앉는 영상 | 첫 장면 | 주변 효과가 짧게 퍼졌다가 잦아듭니다. | 제품이 다시 읽히는 화면으로 닫힙니다. |
| 제품 주변만 계속 움직이는 영상 | 첫 장면 | 제품은 고정하고 주변 요소만 움직입니다. | 제품의 위치와 크기는 처음과 같습니다. |
네 가지 가운데 2~4번은 다른 제품 영상에 적용할 수 있는 설계 대안입니다. 아래에서 실제로 따라 할 초록 사과 바구니 영상은 첫 장면을 기준으로 작은 움직임이 돌아오는 첫 번째 방법을 사용합니다.
카메라 움직임 한 가지를 고릅니다
Static, Orbit, Crane, Pan, Tilt, Tracking, Handheld의 차이와 짧은 프롬프트는 AI 영상 카메라 움직임 7가지에서 확인합니다. 이 실습에서는 카메라 움직임 한 가지만 골라 계획표의 카메라 항목에 적습니다.
같은 이미지를 대화에 넣고 다음 요청문으로 움직임 계획표부터 만듭니다.
붙여넣기 프롬프트첨부한 이미지를 5초 영상의 기준 화면으로 사용하려고 합니다. 아직 최종 영상 프롬프트를 쓰지 말고 다음 내용을 표로 정리해 주세요. 1. 기준 화면: 첫 장면 또는 마지막…
첨부한 이미지를 5초 영상의 기준 화면으로 사용하려고 합니다.

아직 최종 영상 프롬프트를 쓰지 말고 다음 내용을 표로 정리해 주세요.
1. 기준 화면: 첫 장면 또는 마지막 장면 가운데 어느 쪽인지
2. 중심 대상: 영상 끝까지 수량, 형태, 위치와 색을 유지할 대상
3. 주된 움직임: 5초 동안 한 번만 일어날 움직임과 물리적인 원인
4. 시간 순서: 0~1초 시작, 1~4초 변화, 4~5초 끝
5. 끝 상태: 처음으로 돌아오는지 또는 목표 배치에 도착하는지
6. 피할 변화: 새 물체, 글자, 상표, 형태 변형, 장면 전환과 갑작스러운 카메라 이동
7. 카메라 값: 초점거리와 피사계 심도, 움직임 흐림, 노이즈와 광원 색 가운데 유지할 결과
8. 검수 기준: 시작, 중간, 끝 화면에서 비교할 대상 수, 형태, 위치와 새 물체 발생 여부

모호한 값은 질문으로 남기고 제가 선택하기 전에는 최종 프롬프트를 쓰지 마세요.
계획표에서 첫 장면과 작은 움직임이 돌아오는 방식을 고른 뒤 아래 요청문을 붙여넣습니다.
붙여넣기 프롬프트첨부한 승인된 정지 이미지를 첫 화면으로 사용하는 5초 영상 프롬프트를 작성해 주세요. 영상에서 움직일 것: - 카메라: [한 가지 움직임과 속도] - 카메라 값: [초점거…
첨부한 승인된 정지 이미지를 첫 화면으로 사용하는 5초 영상 프롬프트를 작성해 주세요.

영상에서 움직일 것:
- 카메라: [한 가지 움직임과 속도]
- 카메라 값: [초점거리와 피사계 심도, 움직임 흐림, 노이즈, 광원 색]
- 사물: [한 가지 움직임과 원인]
- 빛 또는 반사: [한 가지 작은 변화]

영상 끝까지 유지할 것:
- 대상의 정확한 수량과 처음 모습
- 용기의 형태와 재질
- 주변 물체의 위치
- 바닥과 배경의 구조
- 세로 구도, 색과 그림자 방향

새 물체, 글자, 상표, 사람, 추가 과일, 형태 변형, 갑작스러운 카메라 전환과 장면 전환은 만들지 마세요. 움직임마다 바람, 카메라 이동, 빛의 이동처럼 물리적 원인을 적어 주세요. 결과는 생성 도구에 바로 붙여넣을 수 있는 영어 프롬프트 한 개만 코드 블록으로 작성해 주세요.
이번 실행에서는 위에 공개한 실제 프롬프트를 그대로 입력했습니다. 카메라 움직임 한 가지와 천의 움직임 한 가지만 지시했으며 사과 수와 바구니 형태를 유지하도록 적었습니다. 이 결과는 Seedance 2.0에서 만든 실제 샘플입니다. Seedance 2.5의 기능은 ByteDance Seed 공식 안내에서 따로 확인했지만 검증하지 않은 2.5 결과나 공개 화면에서 확인하지 못한 무제한 프로모션은 이 수업의 결과로 소개하지 않습니다.
이번 실행에서는 5초 영상 한 건에 22.5크레딧을 사용했고 다시 생성하지 않았습니다. 영상을 재생한 뒤 시작 화면과 끝 화면에서 사과 5개, 바구니 철선, 유리병과 접시가 유지되는지 비교합니다.
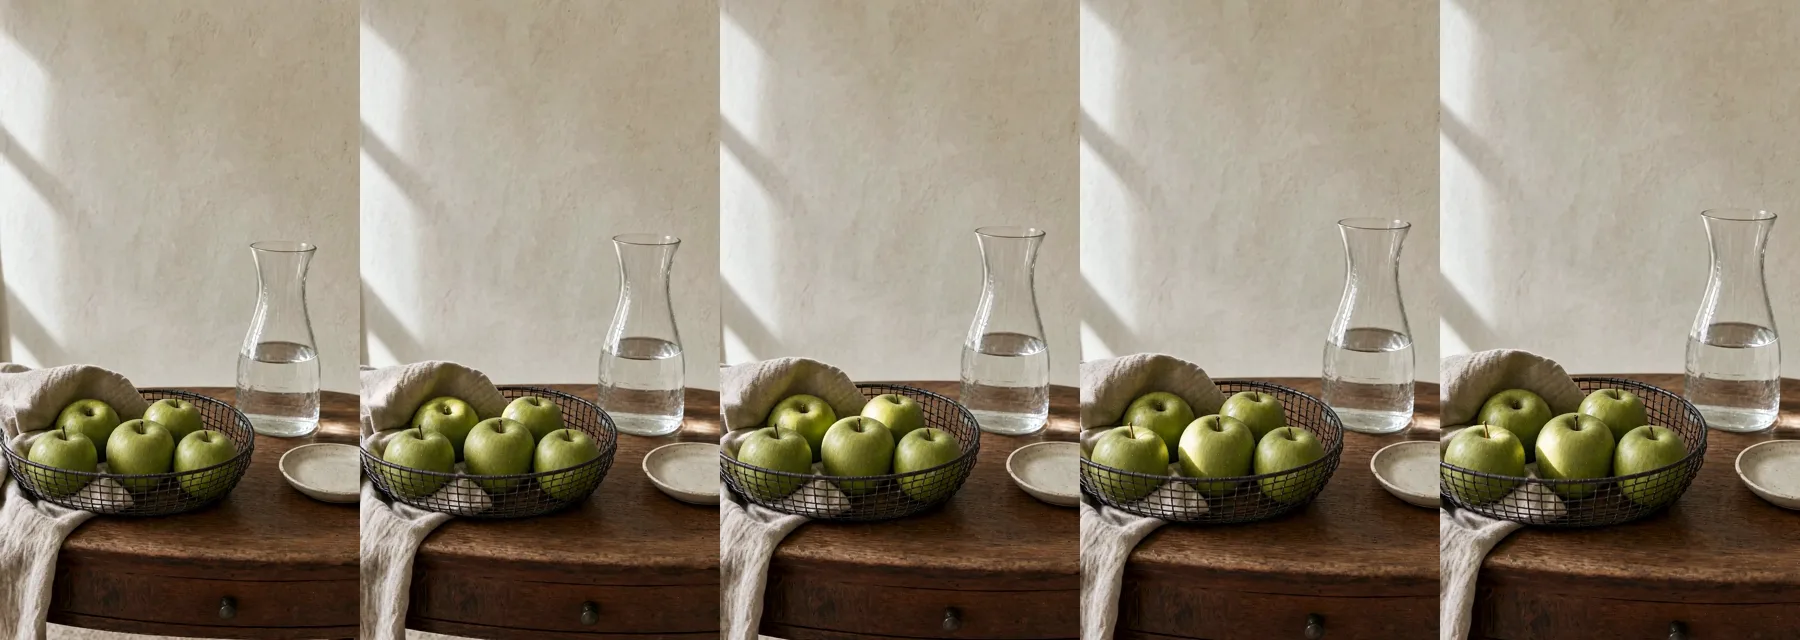
영상의 시작, 중간, 끝 화면을 캡처해 함께 올리고 아래 요청문을 붙여넣습니다.
붙여넣기 프롬프트첨부한 세 이미지는 같은 5초 영상의 시작, 중간, 끝 프레임입니다. 세 프레임을 비교해 영상이 정지 이미지의 구조를 유지했는지 검수해 주세요. 다음 항목을 비교합니다. -…
첨부한 세 이미지는 같은 5초 영상의 시작, 중간, 끝 프레임입니다. 세 프레임을 비교해 영상이 정지 이미지의 구조를 유지했는지 검수해 주세요.

다음 항목을 비교합니다.
- 대상 수와 처음 모습
- 용기 형태와 철선 간격
- 천의 접힘과 움직임 범위
- 주변 물체의 위치와 크기
- 바닥, 배경, 빛과 그림자 방향
- 카메라 움직임이 한 방향으로 이어지는지
- 새 물체, 글자, 상표, 사람, 중복 형태가 생겼는지

항목별로 유지, 변화, 확인 어려움 가운데 하나를 표시하고 프레임에서 확인한 근거를 적어 주세요. 수정이 필요하면 가장 영향이 큰 문제 한두 개만 고치는 영어 영상 프롬프트를 코드 블록 하나로 작성해 주세요. 이미 유지된 물체와 구도는 잠그고 카메라 움직임과 사물 움직임을 각각 하나만 남겨 주세요.
4. HyperFrames에서 15초 순서를 정합니다
정지 이미지는 still.png, 5초 영상은 motion.mp4라는 이름으로 준비한 뒤 HyperFrames에 아래 작업 지시를 입력합니다.
붙여넣기 프롬프트Create a 1080 x 1920 vertical video with a total duration of 15 seconds. Use these assets: - sti…
Create a 1080 x 1920 vertical video with a total duration of 15 seconds.

Use these assets:
- still.png: the approved generated still image
- motion.mp4: the approved five-second image-to-video clip

Timeline:
- 0.0–2.0 seconds: Show the title "한 장에서 시작한 15초" and the subtitle "프롬프트 구조를 새 장면으로 바꿉니다" on a quiet solid background. Keep the text still and readable.
- 2.0–7.0 seconds: Show motion.mp4 at its original speed. Crop only as needed to fill 9:16 without cutting the basket.
- 7.0–12.0 seconds: Show still.png with one very slow scale change from 100% to 104%. Do not add decorative motion.
- 12.0–15.0 seconds: Show three short lines: "유지: 사과 수와 재질", "변경: 구도와 빛", "비용: [실제 비용]". Keep all lines visible long enough to read.

Use one simple crossfade between sections. Keep the palette neutral and do not add stock footage, icons, logos, decorative shapes, or additional generated media. Render one MP4 file and keep the editable project files.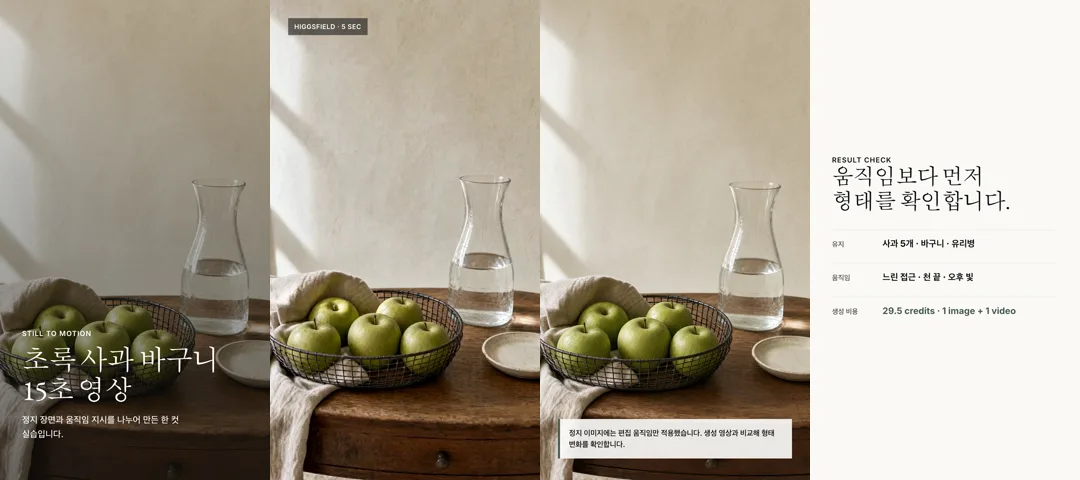
5. FFmpeg로 MP4를 만들고 FFprobe로 확인합니다
HyperFrames에서 내보낸 파일을 hyperframes-export.mp4라는 이름으로 같은 폴더에 둡니다. 터미널에서 아래 명령을 실행하면 1080×1920, 초당 30프레임, H.264 형식의 final.mp4가 생깁니다.
ffmpeg -i hyperframes-export.mp4 \
  -vf "scale=1080:1920:force_original_aspect_ratio=decrease,pad=1080:1920:(ow-iw)/2:(oh-ih)/2,setsar=1" \
  -r 30 -c:v libx264 -pix_fmt yuv420p \
  -c:a aac -movflags +faststart final.mp4
파일의 크기, 프레임 속도와 길이는 다음 명령으로 읽습니다.
ffprobe -v error \
  -show_entries format=duration:stream=width,height,r_frame_rate \
  -of default=noprint_wrappers=1 final.mp4
이번 수업 파일에서는 width=1080, height=1920, r_frame_rate=30/1, duration=15.000000을 확인했습니다.
내 장면으로 바꾸기
아래 틀에서 대괄호 안의 값을 자신의 제품, 공간이나 생활 장면에 맞게 바꿉니다. 실제 판매 제품의 형태가 정확해야 한다면 제품 사진은 그대로 사용하고 배경과 주변 장면만 생성합니다.
Create a photorealistic vertical editorial still-life photograph of exactly [수량] [대상] arranged in [용기의 형태와 재질]. Add [천 또는 주변 재료] with [무늬와 접힘]. Place the scene on [바닥 또는 받침의 재질].

View the scene from [카메라 높이와 각도] with [렌즈 느낌]. Light enters from [빛의 위치와 방향] and creates [그림자의 성질]. Preserve believable [반드시 사실적으로 보여야 할 물리적 특징].

Use [색상 범위]. Vertical 9:16 composition. Do not add [만들지 말아야 할 사람, 글자, 상표, 물체]. Do not change [반드시 유지할 수량과 형태].
확인하고 다시 시도하기
- 정지 이미지에는 정한 수량, 용기 형태, 재질, 카메라와 빛이 보입니다.
- 5초 영상의 시작과 끝에서 대상 수와 형태가 유지됩니다.
final.mp4에는 제목, 5초 영상, 정지 이미지, 작업 기록이 순서대로 보입니다.- FFprobe 결과에는 1080×1920, 30/1, 약 15초가 표시됩니다.
- 이미지와 영상 생성 건수, 예상 비용과 실제 비용을 기록했습니다.
막힐 때
- 정지 이미지의 수량이나 형태가 다르면 영상 생성으로 넘어가지 말고 틀린 항목 한두 개만 수정합니다.
- 영상에서 형태가 흔들리면 카메라 움직임과 사물 움직임을 각각 하나로 줄입니다.
- HyperFrames에서 글자나 바구니가 잘리면 생성 작업을 반복하지 않고 글자 크기, 여백과 화면 맞춤 방식을 고칩니다.
- 새 이미지나 영상을 만들어야 하면 실행 전에 새 건수와 비용을 다시 확인합니다.
더 자세히
추가 내용 펼쳐 보기
기본 실습을 마친 뒤 원문 이미지와 네 가지 움직임 사례를 비교할 때 펼쳐 봅니다.
원문 이미지와 프롬프트
먼저 이 수업의 출발점인 디어무이 게시물 13번 결과 이미지와 14번 프롬프트 카드를 함께 봅니다. 카드의 작은 글자를 확대하지 않아도 읽을 수 있도록 같은 원문을 바로 아래에 글자로 옮겼습니다. 원문에 적힌 카메라 기종과 수치는 게시자가 작성한 값이며 이미지에서 직접 확인한 사실로 사용하지 않습니다.
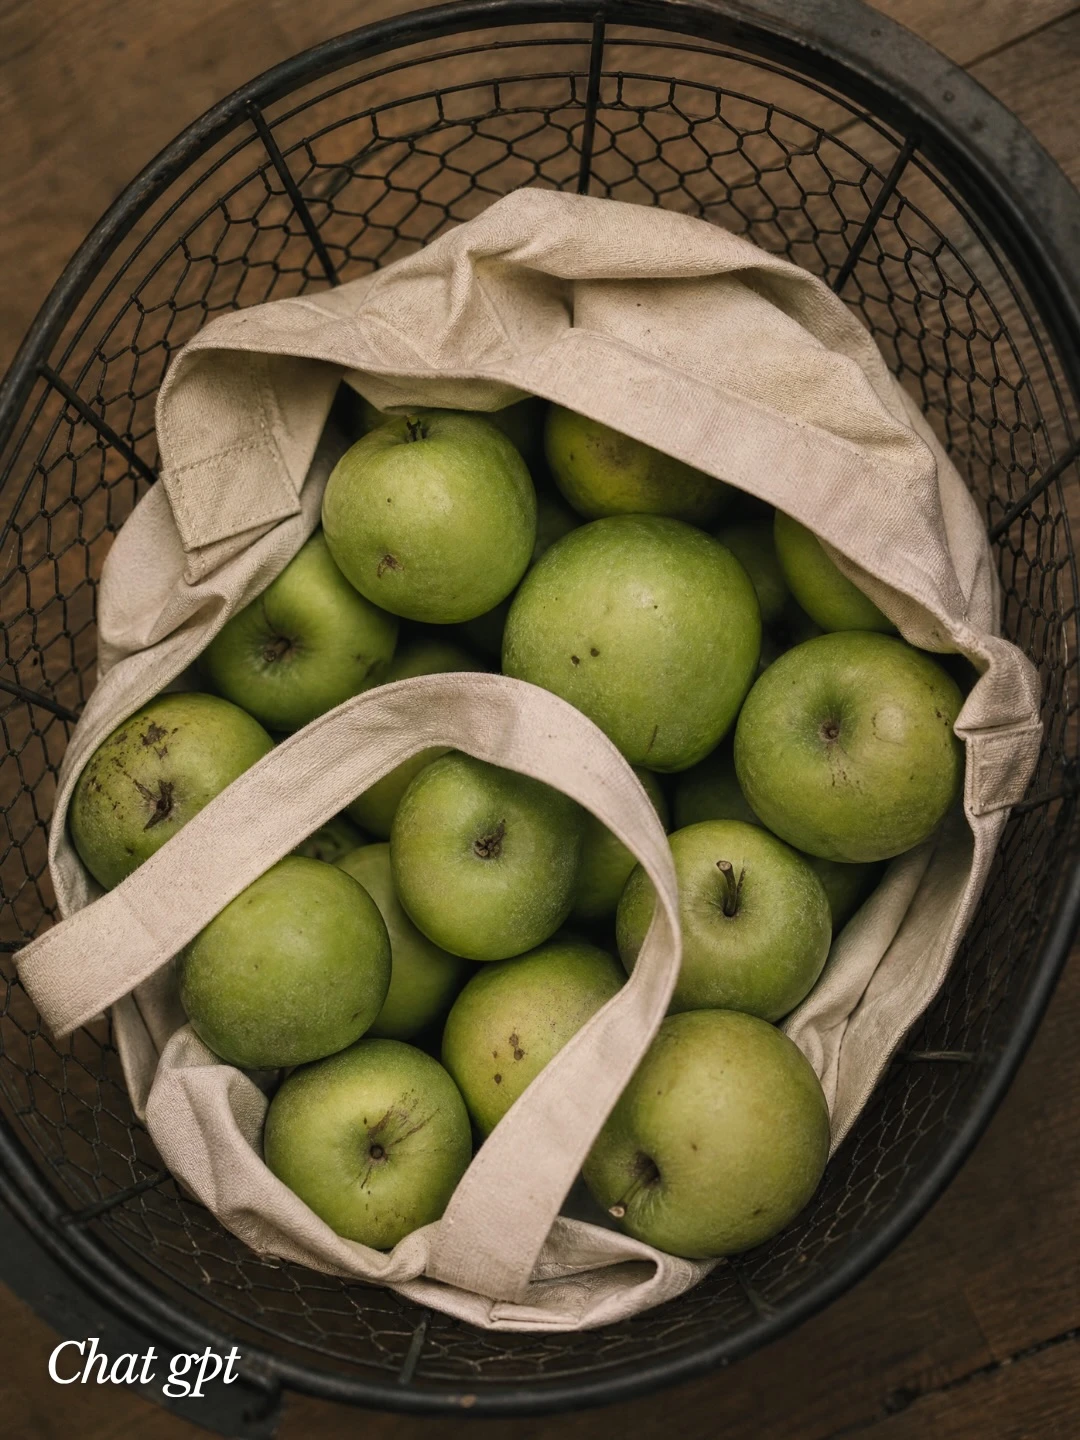
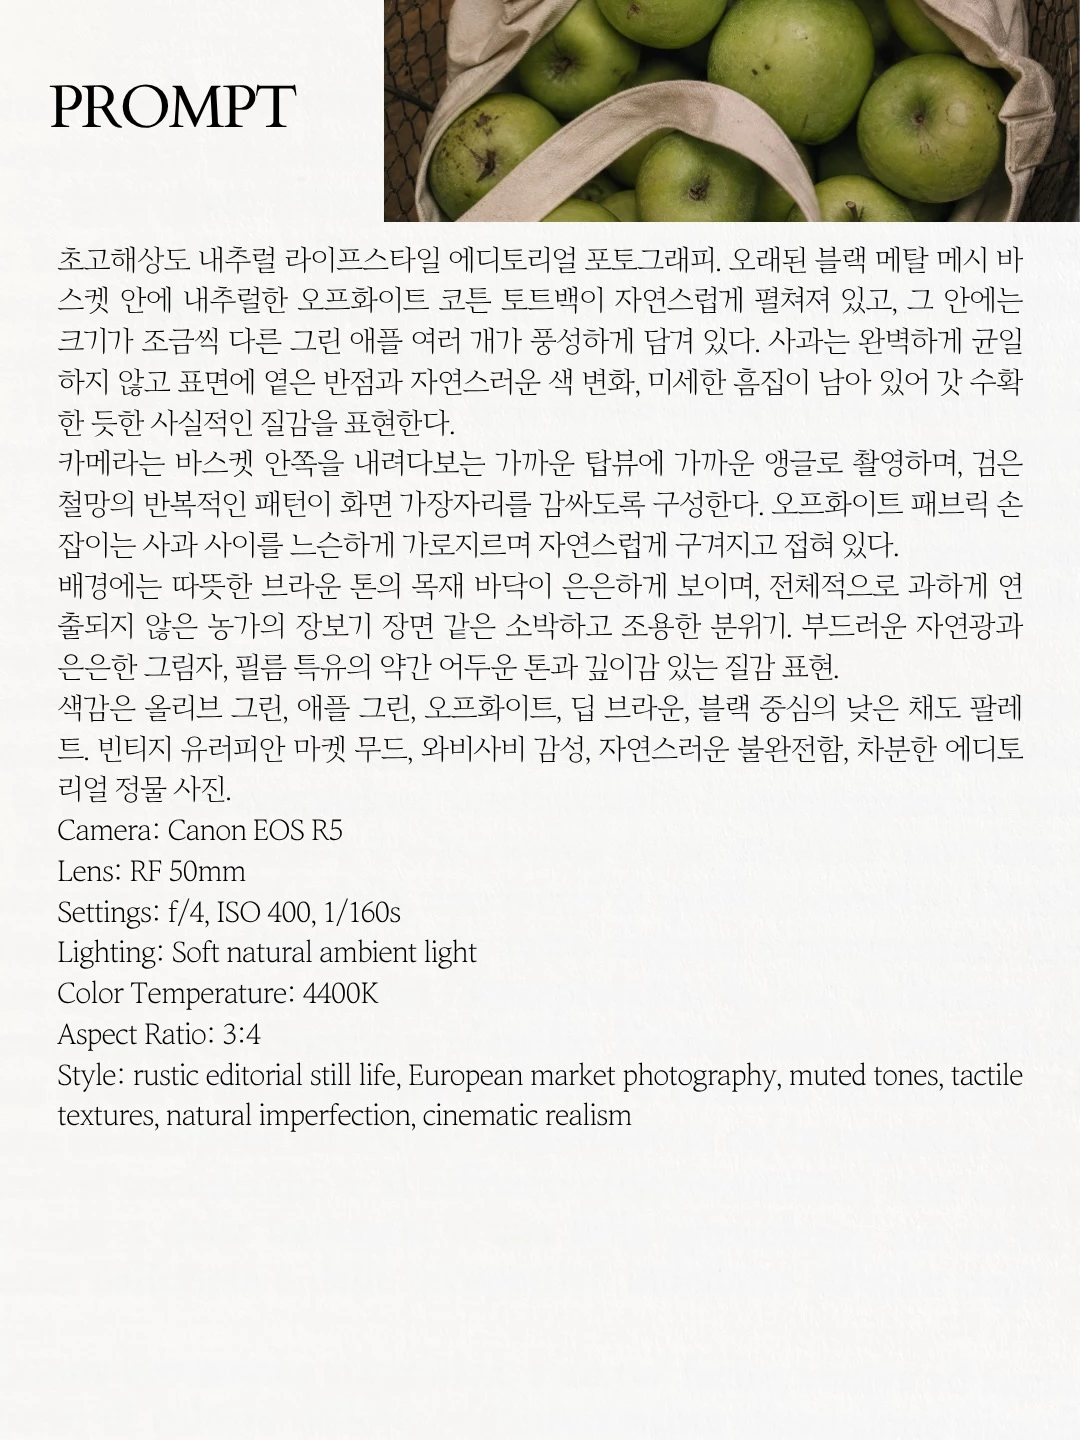
디어무이 이미지 프롬프트 원문 보기 · 849자
초고해상도 내추럴 라이프스타일 에디토리얼 포토그래피. 오래된 블랙 메탈 메시 바스켓 안에 내추럴한 오프화이트 코튼 토트백이 자연스럽게 펼쳐져 있고, 그 안에는 크기가 조금씩 다른 그린 애플 여러 개가 풍성하게 담겨 있다. 사과는 완벽하게 균일하지 않고 표면에 옅은 반점과 자연스러운 색 변화, 미세한 흠집이 남아 있어 갓 수확한 듯한 사실적인 질감을 표현한다.카메라는 바스켓 안쪽을 내려다보는 가까운 탑뷰에 가까운 앵글로 촬영하며, 검은 철망의 반복적인 패턴이 화면 가장자리를 감싸도록 구성한다. 오프화이트 패브릭 손잡이는 사과 사이를 느슨하게 가로지르며 자연스럽게 구겨지고 접혀 있다.
배경에는 따뜻한 브라운 톤의 목재 바닥이 은은하게 보이며, 전체적으로 과하게 연출되지 않은 농가의 장보기 장면 같은 소박하고 조용한 분위기. 부드러운 자연광과 은은한 그림자, 필름 특유의 약간 어두운 톤과 깊이감 있는 질감 표현.
색감은 올리브 그린, 애플 그린, 오프화이트, 딥 브라운, 블랙 중심의 낮은 채도 팔레트. 빈티지 유러피안 마켓 무드, 와비사비 감성, 자연스러운 불완전함, 차분한 에디토리얼 정물 사진.
Camera: Canon EOS R5 Lens: RF 50mm Settings: f/4, ISO 400, 1/160s Lighting: Soft natural ambient light Color Temperature: 4400K Aspect Ratio: 3:4 Style: rustic editorial still life, European market photography, muted tones, tactile textures, natural imperfection, cinematic realism
원문 작성자: dearmooee · 출처 게시물 · 2026-08-17 확인
이미지에서 영상까지 이어지는 네 가지 원문 세트
아래 네 세트에는 원본 제품 사진, 이미지 프롬프트로 만든 기준 화면, 약 5초 결과 영상과 두 프롬프트 원문을 모두 넣었습니다. 영상을 먼저 재생하고 두 원문을 열어 보면 기준 화면, 움직일 대상, 시간 순서와 유지 조건이 결과에 어떻게 연결되는지 같은 페이지에서 비교할 수 있습니다.
원문을 게시된 순서로 다시 확인하려면 제품 영상 움직임 프롬프트 4쌍 보기를 사용합니다.
01. 핑크 세럼 · 첫 화면으로 돌아오는 움직임
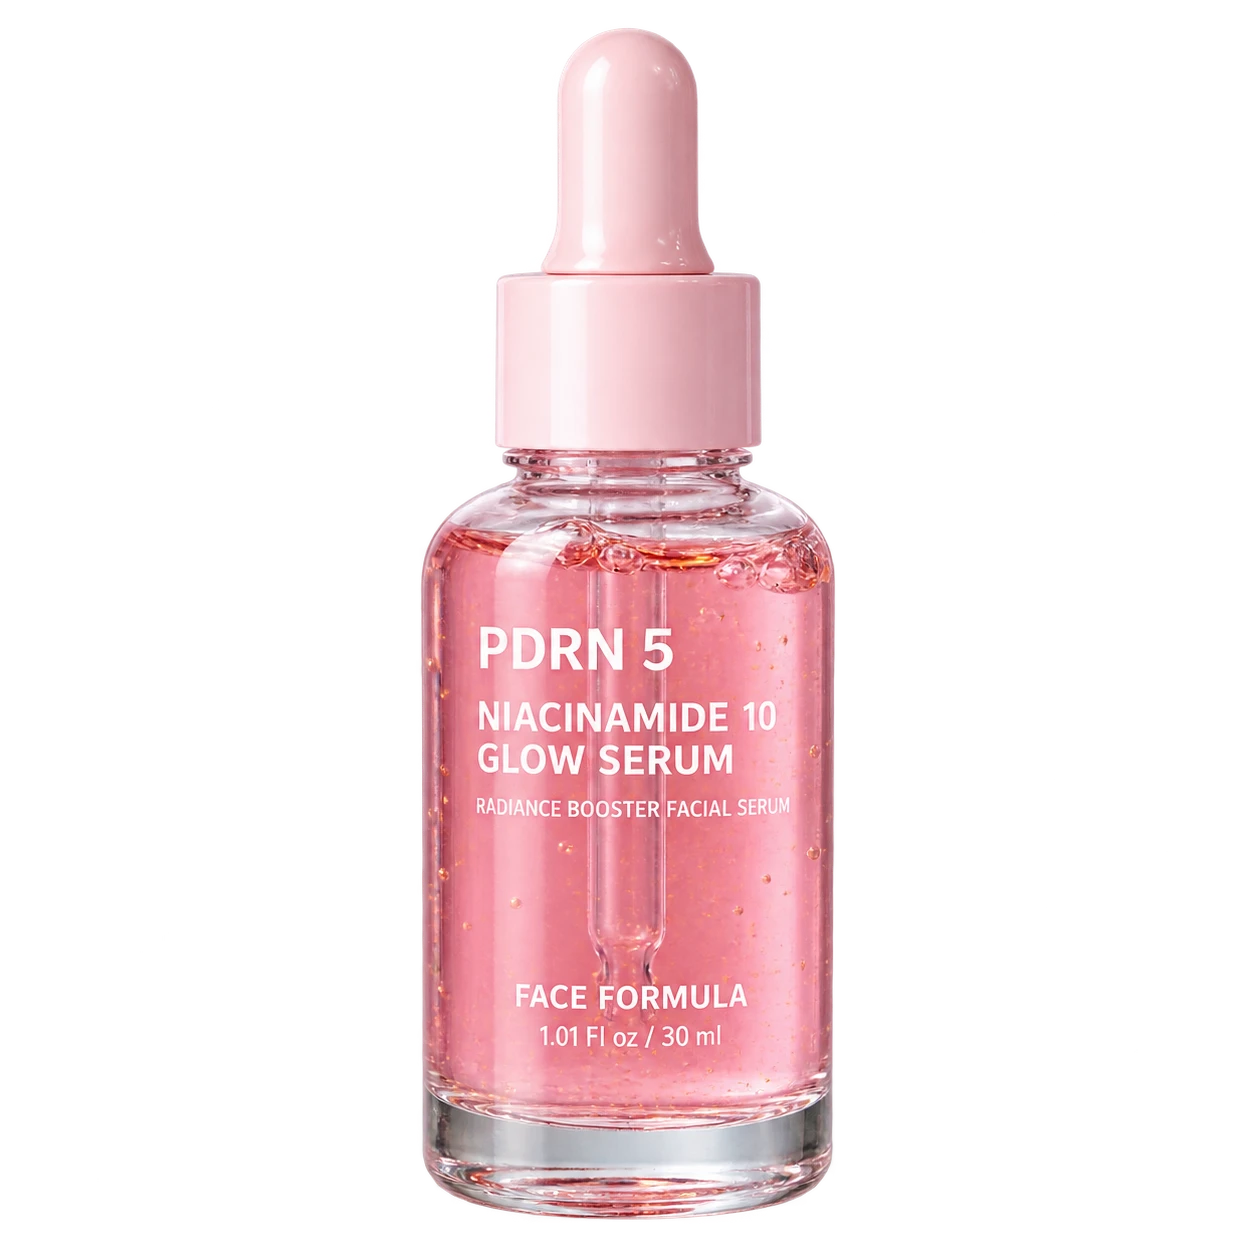
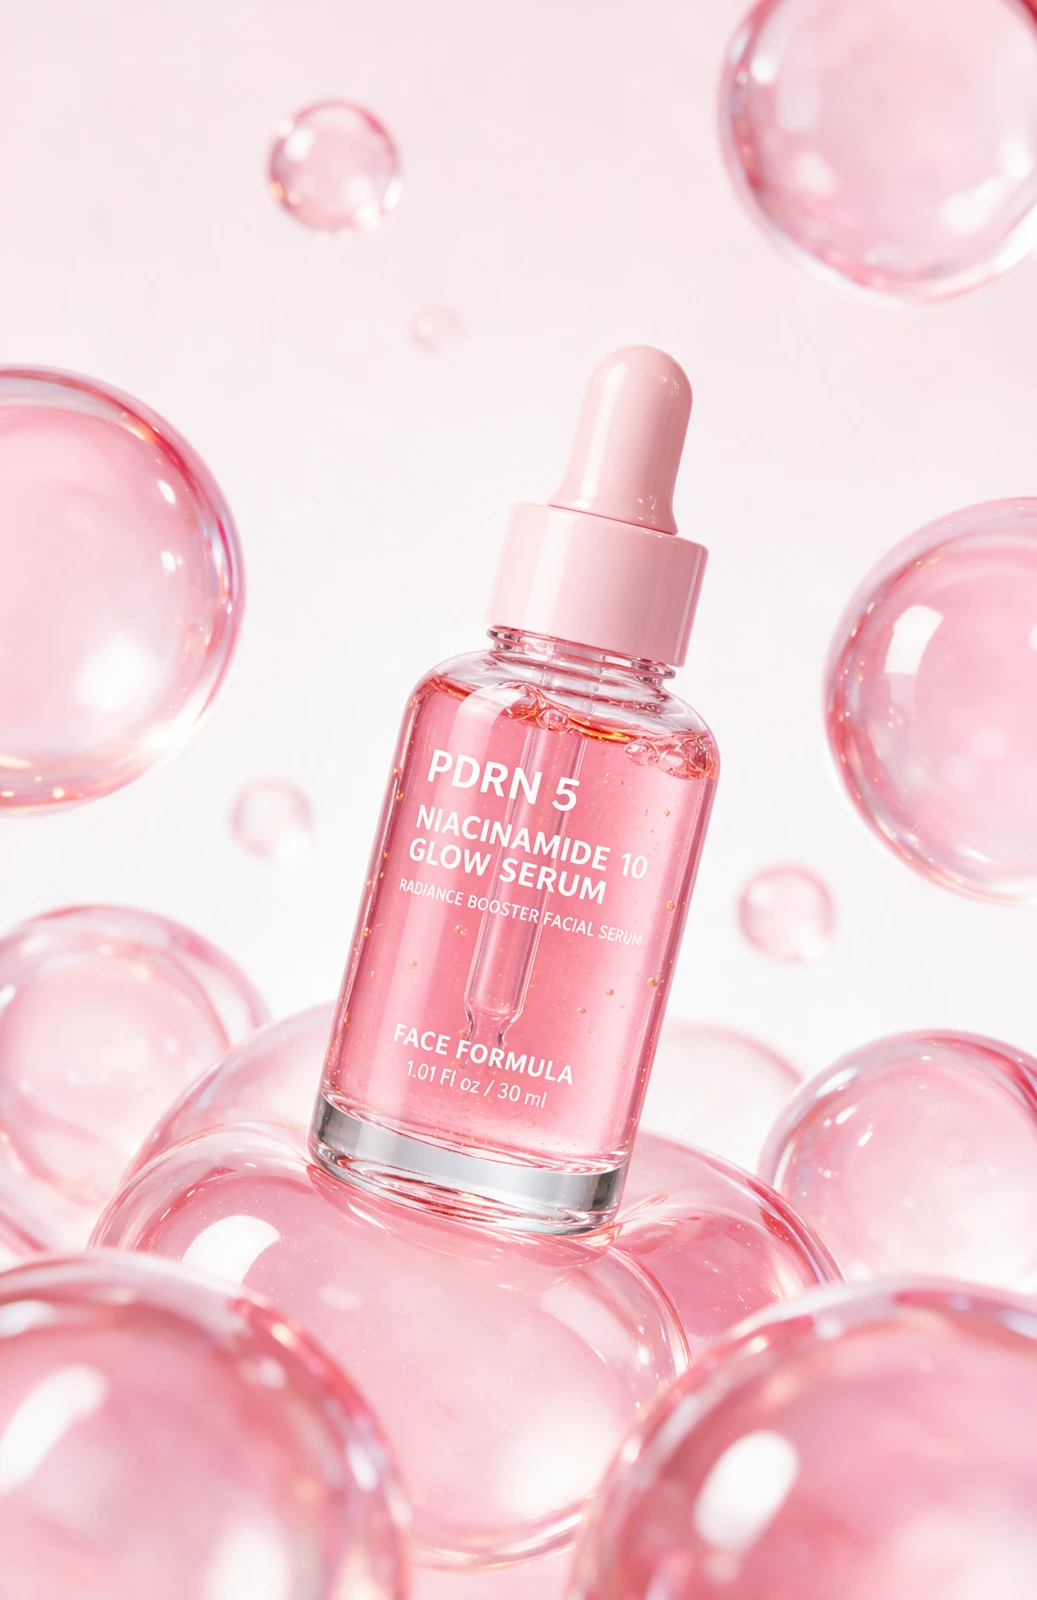
제품 사진을 분홍 젤 버블 장면으로 바꾼 뒤 작은 버블 하나만 위에서 떨어뜨려 시작 화면으로 자연스럽게 이어지게 합니다. 원문 비율은 9:16이며 입력 이미지, 생성 이미지, 결과 영상 순서로 확인합니다.
이미지 프롬프트 원문 보기 · 8,325자
Create a bright, vibrant, premium photorealistic beauty product advertising image using the uploaded product image as the primary reference.
Preserve the product exactly as shown in the uploaded image. Maintain its original shape, proportions, packaging structure, cap, dispenser, material, transparency or opacity, colors, logo, label design, typography, and all printed details.
The product must remain instantly recognizable. Do not redesign, simplify, recolor, deform, or reinterpret it.
COLOR DIRECTION
Analyze the product’s dominant packaging color, logo color, label accents, and overall brand identity. Build a harmonious pastel monochromatic palette based on those colors.
Use:
A luminous background with a clean, visible pastel tint derived from the product’s primary or secondary brand color
Bright translucent bubbles and glossy gel forms in a moderately more saturated variation of the same color family
Clean white highlights with colorful midtones
Softly lifted shadows that preserve color instead of turning gray or white
Clear tonal separation that keeps the product bright, crisp, and visually dominant
If the product is neutral or white, use its strongest logo or label accent color to define the background and bubble palette.
The background tint should remain subtle but clearly visible, approximately 8–12% saturation.
The bubbles and gel forms should use approximately 20–30% saturation, appearing colorful, fresh, and luminous without becoming neon.
Increase the overall color vibrancy by approximately 15–20% compared with a typical pale pastel beauty image.
Keep the product’s original colors accurate, but present them with slightly enhanced clarity, luminosity, and vibrancy.
The final palette should feel bright, fresh, colorful, and polished—not faded, gray, washed out, or overly pale.
COMPOSITION
Create a vertical 4:5 commercial composition.
Place one large hero product near the center, occupying approximately 45–55% of the frame. Position it at a subtle diagonal angle, gently leaning on a large glossy translucent gel bubble.
Show the entire product without cropping. Keep the front label facing the camera and clearly readable.
Use approximately 8–10 visible bubbles and gel forms in total.
Use:
One broad supporting gel bubble directly beneath the product
Five or six large and medium bubbles arranged around the frame edges and lower foreground
Two or three smaller floating bubbles placed sparsely in the upper and middle background
Suggested placement:
One large bubble partially cropped along the left edge
One large bubble partially cropped along the right edge
Three or four large overlapping bubbles across the lower foreground
One medium bubble partially cropped in an upper corner
Two or three small floating bubbles spaced widely in the background
Keep the arrangement asymmetrical and visually balanced. Allow some foreground bubbles to overlap naturally while preserving their clean, rounded individual silhouettes.
Use generous negative space around the upper portion of the product. The bubbles should frame the product without covering its cap, logo, label, or main silhouette.
BUBBLE SIZE BALANCE
The majority of the bubbles must be large or medium-sized.
Approximately 65–75% of the visible bubbles should be large or medium.
Use the following approximate scale:
Large foreground bubbles: 35–60% of the product’s width
Medium bubbles: 20–35% of the product’s width
Small background bubbles: 8–15% of the product’s width
Small bubbles should appear only as subtle background accents. Do not generate many tiny bubbles or fill the empty space with droplets.
BUBBLE MATERIALS
Create clean, smooth, translucent jelly-like bubbles with:
Fresh and clearly visible pastel color
Luminous transparent interiors
Smooth rounded silhouettes
Glossy polished surfaces
Broad diffused white highlights
Richer colored midtones
Gentle internal color gradients
Subtle realistic refraction
Soft, clean edges
Very light shadows with a subtle colored tint
No black rims or gray areas
The bubbles should resemble elegant transparent cosmetic gel bubbles or polished tinted resin spheres.
Their color must remain visible even in the brightest areas. Do not wash the bubbles out to transparent white.
Use slightly deeper color near the bubble edges and soft pastel color through the center, creating attractive depth without dark outlines.
The bubbles should look glossy, fresh, hydrated, colorful, and filled with light.
Do not make the bubbles appear fleshy, biological, cloudy, dirty, heavy, underexposed, or irregularly deformed.
LIGHTING AND EXPOSURE
Use bright, high-key beauty studio lighting with slightly increased brightness while preserving color saturation.
Light the product and bubbles primarily from the front using one very large diffused softbox positioned slightly above the camera.
Add soft white fill light from both sides and below the product. Use white reflector cards to create clean reflections, but do not use so much white fill that the product and bubbles lose their color.
Lighting characteristics:
Bright exposure approximately 0.8–1 stop above neutral
Clean, luminous whites
Bright but colorful midtones
Lifted shadows with visible color detail
Low contrast
Broad white highlights
Soft pastel reflections
Minimal shadow density
Preserved color saturation in transparent materials
No black reflections
No dark transparent edges
No dramatic backlighting
No strong rim light
No deep shadows
No severe highlight clipping
Allow gentle colored light to pass through the translucent bubbles so their pastel tint remains visible and luminous.
Keep the backlight weaker than the frontal lighting to prevent dark outlines, but strong enough to create a bright colored glow inside the bubbles.
Illuminate the product evenly from its cap to its base. Transparent or colored packaging must remain bright, clear, and vibrant while preserving its original material and exact color.
The complete scene should feel surrounded by soft white light without appearing faded or desaturated.
CAMERA AND FOCUS
Use a front three-quarter commercial product-photography angle with an 85mm lens perspective.
Keep the entire product and its front label sharply focused. Use a shallow but controlled depth of field.
Only the distant floating bubbles and the closest edges of the foreground bubbles may become softly blurred. Do not blur the product’s logo, label, cap, edges, or main silhouette.
Maintain realistic product proportions and avoid extreme wide-angle distortion.
OVERALL STYLE
Photorealistic luxury skincare campaign, minimal Korean beauty advertising aesthetic, glossy hydration concept, bright and vibrant pastel color harmony, airy high-key studio lighting, luminous colored bubbles, clean white highlights, polished art direction, premium commercial retouching, realistic materials, refined and elegant composition, high resolution.
The final image should feel bright, fresh, luminous, colorful, glossy, dimensional, and slightly dreamy while remaining clean, refined, and photorealistic.
STRICT EXCLUSIONS
Do not alter the product design, packaging color, proportions, cap, dispenser, logo, typography, label placement, or printed information.
Do not invent additional text. Do not misspell, replace, blur, rearrange, or distort the logo and label.
No duplicated products, extra caps, melted packaging, warped bottle, floating product without physical contact, objects covering the label, or cropped product.
No low saturation, faded colors, washed-out bubbles, gray cast, colorless transparent objects, dull pastel tones, underexposure, dark product, dark bubbles, black reflections, dense shadows, dramatic contrast, muddy colors, brown tint, beige cast, dirty reflections, smoky glass, or dull surfaces.
No excessive saturation, neon colors, fluorescent colors, harsh color casts, or unnatural color clipping.
No flesh-like forms, biological shapes, organ-like blobs, skin-colored objects, silicone implants, slime, melted material, lumpy masses, wrinkled surfaces, cloudy gel, or irregular amorphous props.
No excessive number of bubbles, micro-droplets, foam, bead-like clusters, tiny bubble swarms, evenly repeated bubble patterns, or backgrounds filled with small particles.
No people, hands, flowers, fruit, water splashes, text overlays, borders, or unrelated props.
영상 프롬프트 원문 보기 · 8,545자
Create an exactly 5-second seamless photorealistic image-to-video loop using the uploaded product image as the exact first frame.
Use the uploaded reference video strictly for the new bubble’s starting position, size, falling path, speed, timing, gentle gravity, and restrained physical movement.
PRESERVE THE ORIGINAL SCENE
Maintain the exact original:
Vertical composition and framing
Product position, angle, size, and proportions
Bottle, cap, dropper, glass material, and liquid color
Logo, typography, label layout, and printed information
Pink background and color palette
Existing bubble count, position, scale, transparency, and material
Lighting, highlights, shadows, reflections, and depth of field
The product must remain completely stationary and structurally unchanged.
Do not move, rotate, resize, deform, relight, or animate the product. Keep the label sharp, stable, and readable throughout the entire video.
CAMERA
Use a completely locked-off camera.
No camera movement.
No zoom.
No pan or tilt.
No dolly movement.
No handheld shake.
No reframing.
No focus breathing.
No change in focal length or depth of field.
NEW FALLING BUBBLE
Introduce one new small pearlescent pink bubble from the same starting area as the falling bubble in the reference video.
STARTING POSITION
The new bubble must begin near the upper-left portion of the open background, approximately:
25–30% of the frame width from the left edge
2–5% of the frame height from the top edge
Above and slightly to the left of the product cap
Clearly separated from the large cropped bubble in the upper-right corner
At the exact first frame, the new bubble is positioned just outside the upper edge and remains invisible.
Its lower edge begins entering the frame from the specified upper-left starting position, matching the reference video.
Do not introduce the bubble from the center, upper-right corner, or directly above the product.
BUBBLE SIZE
The new bubble should be only slightly larger than the smallest existing floating bubble in the product image.
Exact size requirements:
Approximately 1.15–1.25 times the diameter of the smallest existing floating bubble
Approximately 50–60% of the product cap’s width
Never larger than 65% of the product cap’s width
Never close to the width of the bottle
Maintain almost the same size throughout the entire fall
Maximum scale variation: 2%
The bubble must remain at a constant depth in the foreground layer. It falls in front of the scene but does not move toward the camera.
MOTION PATH
Match the reference video’s restrained falling path.
The new bubble enters from the specified upper-left starting point and travels downward through the open space along the left side of the product.
Use a gentle curved path:
Enter from the upper-left starting position
Fall slowly downward with slight natural gravitational acceleration
Drift subtly toward the product while remaining beside it
Continue downward past the left side of the product
Reach the upper surface of the lower bubble bed
Make one extremely soft contact
Glide gently along the curved surface of the lower bubbles
Exit naturally through the lower edge of the frame
The falling bubble must not pass across the center of the product. It must not cover the cap, bottle, logo, or label.
Keep the bubble fully visible in front of the scene. Do not allow it to disappear behind the product or behind another bubble.
5-SECOND MOTION SEQUENCE
0–0.3 seconds:
Begin with the exact uploaded image. The new bubble is outside the upper edge at approximately 25–30% of the frame width and remains invisible.
0.3–1.0 seconds:
The lower edge of the new bubble enters smoothly from the specified upper-left starting position. Its full round shape gradually becomes visible.
1.0–3.2 seconds:
The bubble falls slowly down the open space on the left side of the product. Use gentle gravity, slight natural acceleration, and minimal sideways drift. Maintain a nearly constant size and depth.
3.2–3.8 seconds:
The bubble reaches the lower bubble bed and makes one very soft, restrained contact. Allow only 2–3% compression with no dramatic bounce.
3.8–4.7 seconds:
The bubble glides gently along the rounded upper surface of the lower bubbles and continues toward the bottom edge.
4.7–5.0 seconds:
The bubble exits completely through the lower edge. The visible scene returns precisely to the original first-frame composition.
EXISTING AIRBORNE BUBBLES
Add gentle buoyant floating motion only to the existing bubbles that are already suspended in the air.
Do not add floating movement to the product, supporting bubbles, foreground bubbles, or bubbles touching other surfaces.
The airborne bubbles may:
Drift very slowly upward and downward
Move slightly left and right
Follow tiny closed oval or curved paths
Travel no more than 0.5–1% of the frame dimensions
Move independently with different timing and phases
Ease softly at each change of direction
The motion should resemble lightweight bubbles calmly suspended in still air.
Do not rotate, spin, roll, wobble, pulse, or change the orientation of the airborne bubbles.
Do not change their size, shape, transparency, depth, focus level, or surface material.
Keep their highlight direction stable. Allow only minimal natural reflection changes caused by their small positional movement.
Stagger the motions so the airborne bubbles do not rise, fall, or change direction simultaneously.
Each existing airborne bubble must complete a small closed movement path and return to its exact original position at the final frame.
LARGE AND SURFACE-CONTACT BUBBLES
All large cropped bubbles around the frame edges, foreground bubbles, supporting bubbles beneath the product, and bubbles touching another surface must remain stationary.
Do not make them float, slide, roll, rotate, bounce, deform, pulse, or react to the falling bubble.
Allow only extremely subtle stationary highlight shimmer.
LIGHTING AND MATERIALS
Maintain the original bright, high-key pink beauty lighting.
Keep every bubble:
Smooth and round
Bright pink and translucent
Glossy and polished
Luminous and clean
Physically realistic
Free from dark edges or gray shadows
Preserve the original exposure, color saturation, background color, white balance, product highlights, reflections, and shadow direction.
No lighting changes, darkening, flickering, or color shifts.
MOTION STYLE
Photorealistic premium Korean skincare advertising film, elegant cosmetic animation, gentle gravity, calm buoyancy, smooth natural inertia, restrained motion, glossy hydration aesthetic.
The new falling bubble is the primary action.
Only the existing airborne bubbles receive subtle buoyant secondary motion.
The product and all surface-contact bubbles remain completely fixed.
SEAMLESS LOOP REQUIREMENTS
At the beginning, the new falling bubble is completely outside the upper edge at the specified upper-left starting position.
At the end, the new falling bubble is completely outside the lower edge.
At 5 seconds:
Every existing airborne bubble has returned to its exact starting position
The product remains unchanged
All large and surface-contact bubbles remain unchanged
Lighting, reflections, focus, and framing match the first frame
The transition from 5 seconds back to 0 seconds must contain no visible cut, jump, pause, reversal, or flicker.
STRICT EXCLUSIONS
No oversized falling bubble.
No bubble larger than 65% of the product cap’s width.
No bubble growing while falling.
No movement toward the camera.
No incorrect starting position.
No entrance from the center or upper-right area.
No bubble crossing the center of the product.
No covering the cap, logo, or label.
No disappearance behind the product or other bubbles.
No strong bounce, collision, splash, or ripple.
No multiple falling bubbles.
No floating motion on foreground or supporting bubbles.
No rotation or spinning of airborne bubbles.
No synchronized floating motion.
No rapid fall or exaggerated acceleration.
No popping, bursting, fading, dissolving, shrinking, or morphing.
No product movement or deformation.
No camera movement or focus change.
No lighting flicker, color change, or texture crawling.
Duration: exactly 5 seconds.
Loop: perfectly seamless.
Camera: completely static.
Falling bubble starting position: upper-left, matching the reference video.
Falling bubble size: small and nearly constant.
Falling bubble motion: gentle and reference-matched.
Existing airborne bubble motion: extremely subtle, buoyant, independent, and rotation-free.
Product and surface-contact bubble motion: none.
원문 작성자: ai_freaks.kr · 출처 페이지 · 2026-08-18 확인
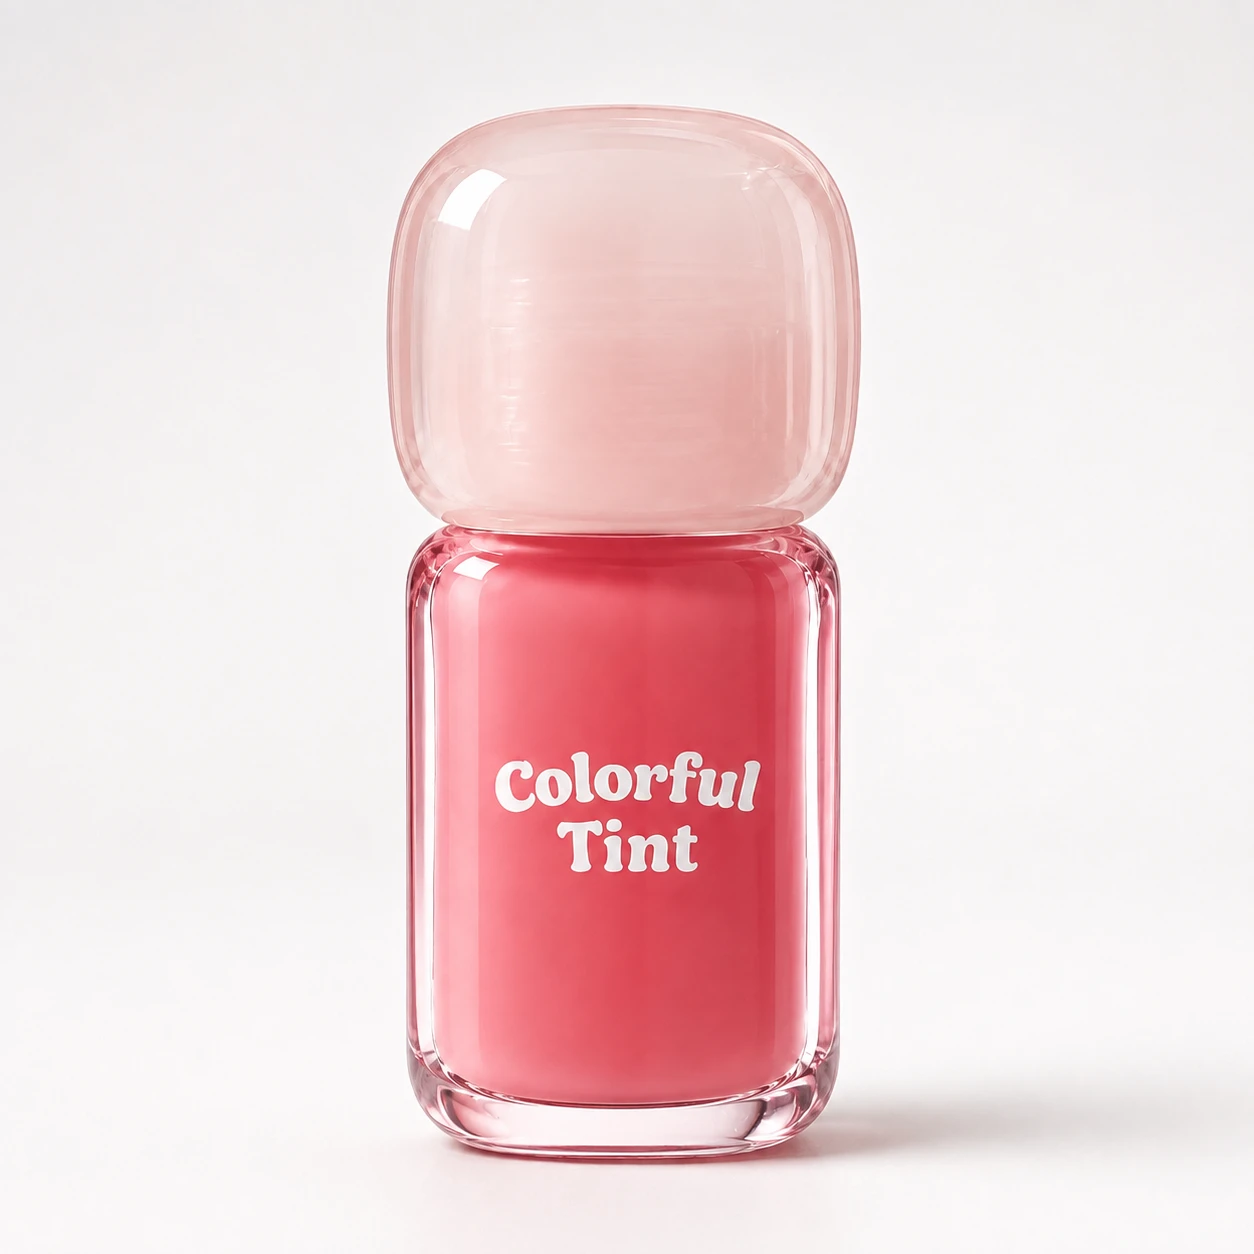
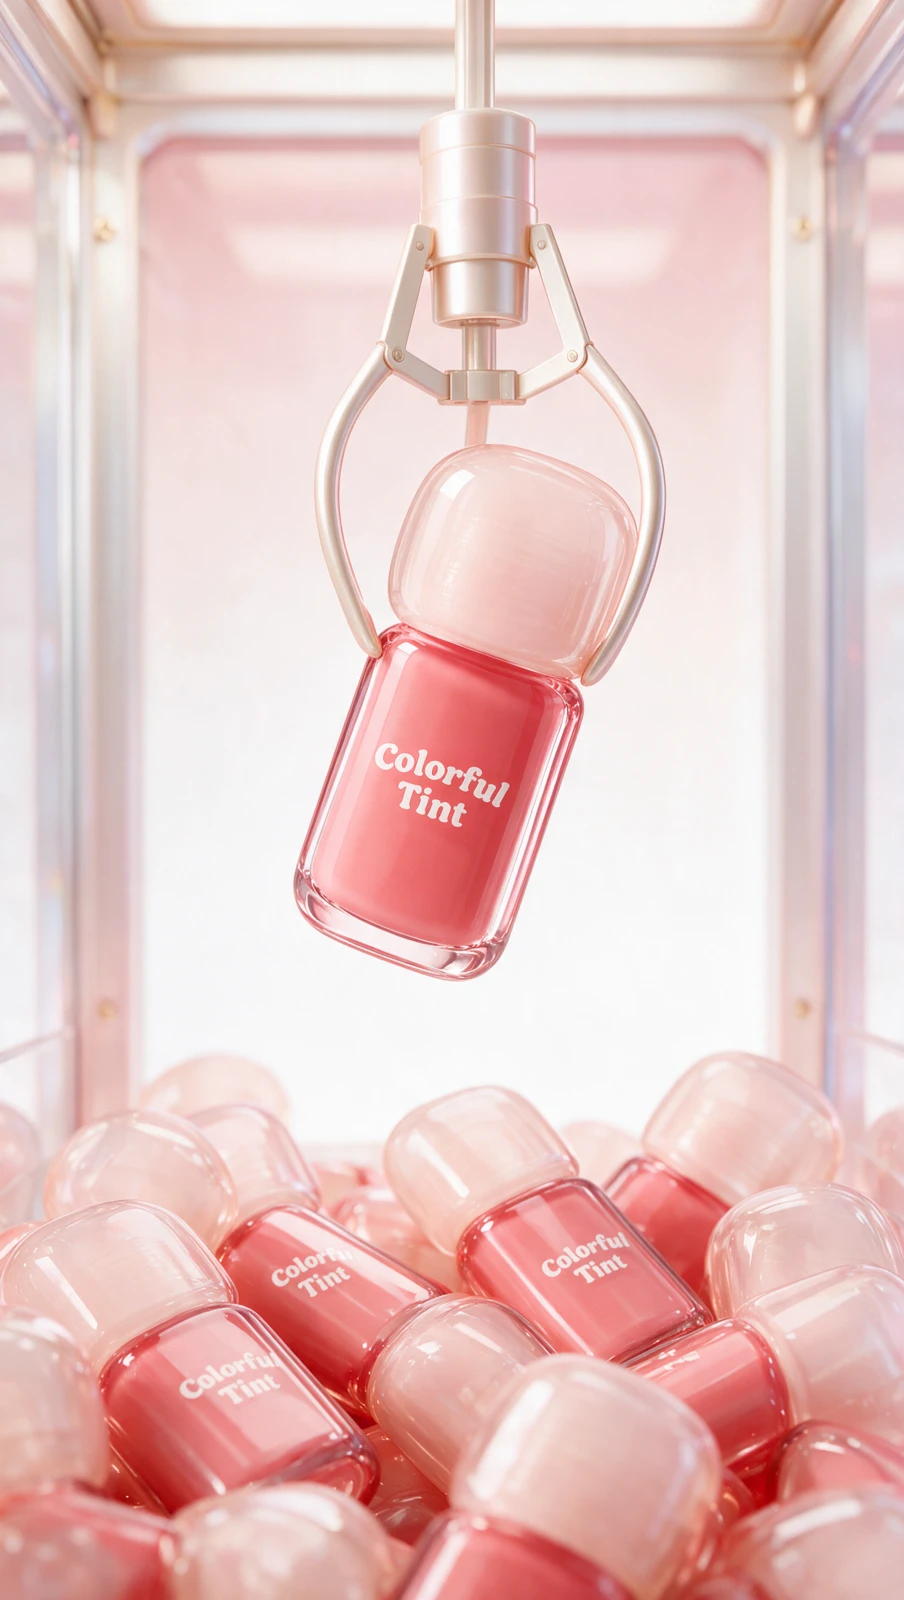
02. 틴트 뽑기 · 마지막 화면에 도착하는 움직임
틴트 제품을 크레인 게임 장면으로 확장하고 집게가 아래 제품을 들어 정해 둔 마지막 위치에 맞춰 멈추게 합니다. 원문 비율은 9:16이며 입력 이미지, 생성 이미지, 결과 영상 순서로 확인합니다.
이미지 프롬프트 원문 보기 · 13,904자
Using <<image1>> as the sole and absolute product reference, create an exceptionally bright, milky, high-key premium photorealistic CGI advertising still inside a luxury claw machine, composed vertically in 9:16.
The final image must feel fresh, airy, softly illuminated, and significantly brighter than a conventional product render. The products—not the background—must be the brightest and most visually luminous subjects in the scene.
ABSOLUTE PRODUCT REFERENCE:
Identify the single product in <<image1>> and reproduce it accurately. Preserve its exact silhouette, proportions, cap shape, cap size, rounded corners, transparent outer packaging, wall thickness, fill level, materials, logo, typography, letter spacing, logo placement, and all existing packaging details.
Use <<image1>> as the geometry and packaging reference. Preserve the original product hue, but present it in a brighter, softer, milkier, lower-contrast lighting environment.
Create one accurate master 3D product model from <<image1>>. Generate every product in the scene exclusively as an exact instance of this one locked master model. Do not independently redraw, redesign, or reinterpret individual copies.
STRICT PRODUCT CONSISTENCY:
Every product must have exactly the same:
Physical dimensions and 1:1 real-world scale.
Width, height, depth, and corner radius.
Cap dimensions, translucency, and color.
Transparent wall thickness.
Internal fill level.
Internal product hue.
Logo spelling, typography, size, spacing, alignment, and placement.
Surface finish, reflections, transparency, and material structure.
The lifted product and all products in the lower pile must use a uniform scale of exactly 100%.
No miniature copies, oversized hero product, enlarged caps, compressed bodies, stretched packaging, or inconsistent proportions. Products positioned at similar camera depth must appear exactly the same size.
MANDATORY BRIGHT PRODUCT APPEARANCE:
Render the lifted product and all products in the lower pile visibly brighter and milkier than the product in <<image1>>.
Use these locked visual targets:
Product exposure: +0.6 to +0.7 stop relative to <<image1>>.
Product center luminance: approximately 22–28% brighter than <<image1>>.
Product shadow luminance: approximately 25–30% brighter.
Product saturation: approximately 12–18% lower.
Product contrast: approximately 15–20% softer.
Product black point: strongly raised.
Transparent edge luminance: bright, clean, and pale.
Internal product color: luminous pastel coral-pink mixed visually with approximately 15–20% soft white light.
Cap: very pale translucent blush with creamy internal diffusion.
Logo: clean neutral white with sharp readable edges.
Highlight roll-off: broad, soft, and creamy.
Brightness must come from dominant neutral-white frontal illumination—not from increasing red, coral, pink, or magenta saturation.
The internal product color must remain light pastel coral-pink. It must never become deep red, crimson, burgundy, dark rose, heavily saturated, dense, muddy, or opaque.
No visible product face may be darker than the product in <<image1>>.
PRODUCT-TO-BACKGROUND LIGHTING RATIO:
The products must be brighter than the background behind them.
Set the lighting hierarchy as follows:
Lifted product and visible foreground products: brightest subjects.
Claw mechanism and nearby machine structure: slightly darker than the products.
Background panel and machine walls: softly luminous but clearly less bright than the products.
The frontal surface of each visible product should be approximately 10–15% brighter than the background directly behind it.
Do not create an extremely bright white background that forces the products into relative darkness. Do not use the products as silhouettes against a glowing back wall.
The frontal product key light must be approximately 0.5 stop stronger than the rear background illumination.
MASTER-MODEL LABEL LOCK:
Apply one identical locked packaging texture to every product instance. Do not regenerate the logo separately for different copies.
The correct logo from <<image1>> must appear only on the true front branding surface. Preserve its exact spelling, typeface, line break, letter shapes, spacing, size, alignment, and position.
Products facing sideways or backward must show the correct side or rear surface. Never place the front logo on a side, bottom, cap, or rear panel.
Partially hidden labels may be naturally occluded, but all visible letters must remain structurally correct.
Prioritize perfect geometry and logo fidelity on:
The lifted hero product.
The 8–10 most visible foreground products.
Every product with its front branding surface facing the camera.
COMPOSITION:
Create a clean luxury claw-machine interior with transparent pastel walls and a pale luminous environment.
Place one claw mechanism at the upper center. Suspend exactly one hero product beneath it, centered above the lower pile. Tilt the product approximately 10–14 degrees counterclockwise while keeping its branding surface directed toward the camera.
Fill the lower 35–40% of the frame with approximately 20–30 identical products. Preserve a full, abundant pile while maintaining a clean open area between the lifted product and the top of the pile.
All lower products must remain rigid, physically separate, undeformed, and identical in scale.
SLIM REFINED CLAW:
Use one elegant three-pronged claw with thin, delicate, gently curved arms.
Each curved claw arm must have a visible diameter of approximately 2.5–3.5% of the product body width.
The upper linkage bars must be thin and flat, approximately 3–4% of the product width. The central cylindrical housing must remain compact and no wider than approximately 28–32% of the product body width.
The claw tips must be narrow and tapered. Each tip must be no wider than approximately 5–6% of the product width.
Avoid thick tubes, swollen arms, oversized joints, large gripping pads, heavy mechanical blocks, or industrial-looking hardware.
Finish the claw in very pale pearl blush or softly tinted champagne-white metal. It must remain light, soft, and visually secondary to the product.
REALISTIC DELICATE GRIP:
The three slim claw tips must securely grip the narrow seam immediately beneath the product cap.
Use three-point contact:
One thin tip contacts the left side of the cap seam.
One thin tip contacts the right side of the cap seam.
The third thin tip supports the rear side and remains partially visible.
The tips gently hook beneath the cap’s lower rim with zero visible air gap. Add only tiny localized contact shadows and pale reflected highlights.
The product’s center of mass hangs naturally below the grip. Keep the central shaft vertical while the product hangs at a stable 10–14 degree angle.
The grip must appear physically secure without crushing, squeezing, denting, scratching, piercing, bending, or deforming the product.
LOWER PRODUCT PILE:
Arrange approximately 20–30 exact master-model instances across the bottom.
Use believable rigid-body contact and gravity. Maintain natural overlaps and stable weight distribution without fused packaging, impossible intersections, floating objects, or deformation.
Avoid excessive transparent stacking that creates dark red color accumulation. Use artistically controlled light transmission so overlapping products remain light pastel coral-pink.
Where multiple products overlap, do not multiply their color density. Keep overlapping regions only slightly darker than single-product regions.
Limit pile contact shadows to small, soft areas directly at physical contact points. Do not create broad ambient-occlusion shadows across product faces.
The 8–10 most visible products must receive direct frontal illumination and remain as bright and clean as the lifted product.
BRIGHTNESS OF THE LOWER PILE:
The lower pile must not be darker than the lifted product.
Use the following exposure relationship:
Lifted hero product: +0.7 stop relative to <<image1>>.
Most visible foreground products: +0.6 to +0.7 stop.
Mid-pile products: +0.5 to +0.6 stop.
Distant or partially hidden products: no darker than +0.3 stop.
Even products near the bottom edge must retain bright pastel midtones and open shadows.
Do not let the lower products become darker simply because they are overlapping, near the floor, or below the hero product.
PALETTE AND MACHINE MATERIALS:
Automatically derive the environment from the lightest colors in <<image1>>.
Use:
Milky blush white.
Very pale baby pink.
Warm pearl white.
Soft champagne-pink.
Lightly tinted transparent acrylic.
Creamy off-white reflections.
Keep the environment approximately 40–50% less saturated than the product.
The machine structure must be pale and softly colored. Do not use dark gray, gunmetal, black, dark chrome, bronze, copper, or saturated rose gold.
Use frosted pastel acrylic, pearl-coated metal, translucent milky panels, and very restrained reflections.
DOMINANT FRONTAL PRODUCT LIGHTING:
Use a large neutral-white frontal beauty light as the dominant light source.
The frontal beauty light must illuminate the entire product face evenly and must be stronger than the background light.
For the lifted product, use:
One extremely large neutral-white frontal softbox close to the camera axis.
A broad upper-front diffused key light.
Large left and right frontal fill panels.
A pale lower-front bounce card.
Gentle rear transmission through the cap and transparent packaging.
Thin controlled edge highlights.
A broad creamy vertical reflection across the product face.
Keep the center, sides, and lower portion of the lifted product evenly bright. No dark center, red pooling, dark lower corners, or strong side gradient.
For the lower pile, use:
A separate large frontal softbox aimed specifically at the pile.
A broad overhead neutral-white softbox.
Large low-positioned left and right fill panels.
A bright white bounce card immediately in front of the pile.
A softly illuminated floor panel operating only as secondary fill.
Gentle transmission lighting through the caps.
The frontal pile light must be stronger than the glowing floor and background lights.
Do not rely mainly on backlight or floor light. Backlighting must remain secondary because it can make the product faces appear dark.
BACKGROUND LIGHTING:
Keep the background soft, pale, and luminous but not intensely bright.
The rear panel must be approximately 10–15% darker than the illuminated product faces. Use a pale blush-to-warm-white gradient with no pure white hotspot directly behind the lifted product.
The machine corners and transparent walls should remain softly visible rather than disappearing into overexposure.
Add a gentle milky diffusion to the background only. Do not place thick fog, haze, or diffusion over the product faces or logos.
OVERALL HIGH-KEY TREATMENT:
Create a bright, airy, milky cosmetic-campaign finish.
Apply:
Overall scene exposure: approximately +0.45 to +0.55 stop.
Product exposure: approximately +0.6 to +0.7 stop.
Raised black point.
Strongly opened shadows.
Pastel midtones.
Approximately 15% softer contrast.
Approximately 10–15% lower environmental saturation.
Neutral-to-slightly-warm white balance.
Soft creamy highlight roll-off.
Very subtle bloom restricted to the brightest reflections.
Gentle optical diffusion in the environment.
Minimal ambient occlusion.
No vignette.
The result should feel approximately 18–25% brighter and milkier than the previous output.
Maintain enough edge definition to preserve the transparent packaging, pale claw structure, and individual product boundaries. The image must be bright and milky without becoming flat, featureless, foggy, or completely white.
CAMERA:
Use a centered straight-on premium product camera with a moderate commercial-product focal length. Avoid wide-angle distortion.
Keep the lifted product, claw contact points, and the most visible foreground products sharp. Allow only distant pile products to become gently out of focus.
Maintain natural perspective so all products share the same physical dimensions.
HARD CONSTRAINTS:
Exactly one slim three-pronged claw, one lifted product, and approximately 20–30 identical products in the lower pile.
All products are exact 1:1-scale instances of one locked master model derived from <<image1>>.
The lifted product and foreground pile products must be brighter than the background directly behind them.
No dark products, deep red centers, burgundy tint, crimson color, dense internal color, crushed shadows, heavy contrast, dark lower pile, strong vignette, or broad ambient occlusion.
No background-dominant exposure, silhouetted products, intensely glowing rear wall, overpowering floor light, or backlight stronger than the frontal product light.
No excessive saturation, red color boost, magenta cast, neon pink, or color accumulation in overlapping products.
No thick claw arms, chunky tubes, swollen curves, oversized joints, large gripping pads, heavy mechanism, or dark metal.
No hovering tips, visible grip gaps, unsupported product, loose grip, impossible balance, or claw-product intersection.
No resized products, miniature copies, oversized hero product, inconsistent caps, warped containers, altered fill levels, fused products, or melted packaging.
No misspelled logos, malformed letters, mirrored typography, invented text, pseudo-text, inconsistent logo placement, extra labels, blank front-facing products, or logos printed on the wrong surface.
No pure-white erased products, unreadable logo, extreme bloom, thick fog, opaque milky coating, or lost transparent edges.
No title, headline, caption, subtitle, promotional copy, CTA, interface element, badge, border, added logo, signature, or watermark. Preserve only the original text physically printed on the product in <<image1>>.
No people, hands, faces, unrelated prizes, extra props, loose caps, open packaging, spills, broken containers, or deformation.
영상 프롬프트 원문 보기 · 10,296자
Create a 5-second premium photorealistic CGI product animation in vertical 9:16 for Seedance 2.5, using the supplied image as the mandatory locked final frame.
FINAL-FRAME PRIORITY:
The supplied reference image represents the exact appearance and composition required at 5.0 seconds. Preserve its product design, claw-machine structure, pastel palette, lighting, exposure, camera position, focal length, framing, product quantity, pile arrangement, and final suspended-product position.
At exactly 5.0 seconds, the generated video must align perfectly with the supplied final-frame image. Do not reinterpret, redesign, crop, zoom, recolor, or recompose the final frame.
ACTION:
Show the claw machine naturally picking up one product from the pile and lifting it into the exact suspended position shown in the supplied final-frame image.
The action must feel physically believable, controlled, elegant, and clearly readable. The claw moves on a strictly vertical mechanical path. It does not swing forward or backward, orbit around the product, drift in depth, or move toward the camera.
ANIMATION TIMELINE:
0.0–0.6 seconds:
Begin with the same locked camera, machine interior, lighting, and lower product pile seen in the supplied final frame.
The slim three-pronged claw is positioned lower in the machine, directly above the selected product near the upper center of the pile. The claw is open. The selected product is resting naturally among the other products and uses the exact same shape, scale, color, cap, logo, and proportions as every other product.
The central claw cable is perfectly vertical. The surrounding products remain almost completely still.
0.6–1.3 seconds:
The claw descends vertically by a short distance toward the selected product. The motion is smooth, slow, and mechanically precise with gentle ease-in.
The three thin claw arms remain open and pass cleanly around the product cap. They do not touch, push, or knock over unrelated products.
The camera, background, machine walls, and lighting remain completely locked.
1.3–2.0 seconds:
The three slender claw tips close inward around the narrow seam directly beneath the product cap.
Use a convincing three-point grip:
One thin tip contacts the left side of the cap seam.
One thin tip contacts the right side of the cap seam.
The third thin tip supports the rear side of the seam.
The tips gently hook beneath the lower cap rim with zero visible gap. Add tiny localized contact shadows and subtle reflected highlights where the claw touches the cap seam.
The product remains rigid and undeformed. The claw does not squeeze the wide product body.
2.0–2.4 seconds:
The claw completes its grip and pauses briefly to establish secure physical contact.
The selected product lifts only a few millimeters, separating cleanly from the pile. Two or three immediately neighboring products make an extremely small rigid settling movement into the space it leaves.
No bouncing, rolling cascade, jelly motion, deformation, wobbling pile, or large secondary movement.
2.4–4.2 seconds:
The claw raises the selected product smoothly upward along one straight vertical path.
The cable, central claw housing, and grip point move vertically without lateral drift. The lifted product hangs naturally beneath the claw at approximately a 10–14 degree counterclockwise tilt.
Allow only one tiny damped pendulum response of no more than 2–3 degrees immediately after leaving the pile. The swing must quickly settle and must never rotate around the claw, turn backward, orbit in depth, or face away from the camera.
The front logo remains directed toward the camera and readable throughout the lift.
The claw arms maintain continuous physical contact with the cap seam. No grip slipping, opening, hovering, clipping, or changing contact points.
4.2–4.5 seconds:
The claw gently decelerates as it reaches the exact upper-center position shown in the supplied final-frame image.
The lifted product performs one nearly imperceptible settling movement of less than 1 degree. The motion must feel weighted and mechanically damped rather than springy.
4.5–5.0 seconds:
All movement stops.
Hold the final composition completely still for the last 0.5 seconds. Match the supplied final-frame image exactly: identical camera framing, claw height, cable position, product angle, product size, grip location, pile layout, lighting, color, exposure, background, shadows, and reflections.
The final frame must be stable enough to function as a clean premium product packshot.
CLAW DESIGN AND MECHANICS:
Use one elegant, compact, three-pronged claw with long, thin, gently curved arms.
Each curved arm must remain approximately 2.5–3.5% of the product body width. The claw must not become thicker, larger, heavier, or more industrial during the animation.
Keep the joints small, the central housing compact, and the contact tips narrow and tapered. The claw must remain the same shape and scale throughout the entire shot.
The three tips grip only the narrow cap seam. They must never grip the middle of the product body.
The tips remain visibly connected to the product from the moment of closure until the final frame. The claw must realistically support the product’s full weight.
PRODUCT CONSISTENCY:
Treat every visible product as an exact instance of one locked master model taken from the supplied image.
Preserve the exact:
Product silhouette and proportions.
Body and cap dimensions.
Transparent packaging thickness.
Internal fill level.
Light coral-pink product color.
Cap translucency.
Logo spelling and typography.
Logo size, spacing, alignment, and placement.
Materials, reflections, and surface finish.
The lifted product and all products in the lower pile must remain exactly the same physical size. No product may grow, shrink, stretch, compress, morph, or change proportions during the video.
Lock the packaging texture to each product’s physical surface. The logo must not float, slide, flicker, distort, change spelling, disappear, or rotate independently.
Only products whose true front surface faces the camera may display the front logo. Sideways and backward-facing products must show their correct side or rear surface, not an incorrectly placed logo.
LOWER PILE BEHAVIOR:
Preserve approximately the same number of products and the same pile density as the supplied final frame.
All lower products are rigid, solid packaging objects. They are not balloons, jelly, soft rubber, liquid blobs, or inflated forms.
Only products directly touching the selected product may move slightly as it is removed. Limit this reaction to a few millimeters and complete it before 2.8 seconds.
After settling, the entire lower pile must remain completely stationary through the end of the video.
No mass shifting, breathing, rippling, pulsing, wobbling, melting, crawling, floating, or continuous movement.
BRIGHT MILKY LIGHTING:
Maintain the bright, airy, milky lighting of the supplied final image throughout the full video.
Keep the lifted product and lower pile approximately 0.3–0.4 stop brighter than neutral product exposure. Brightness must come from soft neutral-white illumination, not increased red or pink saturation.
Use:
A large neutral-white overhead softbox.
Broad frontal beauty lighting.
Soft left and right fill lights.
A glowing white floor panel beneath the pile.
Gentle transmission light through the translucent caps.
Pale controlled edge highlights.
Soft white bounce light on the lifted product.
Maintain luminous light coral-pink product centers. Do not allow the products to become dark red, burgundy, crimson, muddy, opaque, or heavily saturated during motion.
Exposure, white balance, saturation, and contrast must remain constant from the first frame to the final frame. No brightness pumping, color shift, flickering, or automatic exposure adjustment.
CAMERA:
Use a completely locked-off camera for the entire 5-second shot.
No camera movement of any kind:
No zoom.
No push-in or pull-out.
No pan or tilt.
No dolly movement.
No handheld motion.
No reframing.
No lens breathing.
No focal-length change.
No depth-axis drift.
No perspective change.
Maintain the exact final-frame focal length and framing from beginning to end.
Use controlled depth of field. Keep the claw, lifted product, grip points, and most visible foreground products clear and recognizable. Do not introduce focus hunting.
MOTION QUALITY:
Premium commercial CGI animation with realistic weight, rigid-body physics, smooth mechanical motion, precise contact, gentle ease-in and ease-out, subtle motion blur only during vertical movement, clean transparent-material rendering, refined reflections, and detailed 4K appearance.
The animation should feel like a real luxury claw machine successfully picking up a cosmetic product—not a floating product being followed by decorative claw arms.
HARD CONSTRAINTS:
The supplied image is the mandatory exact final frame.
Exactly one claw lifts exactly one product. Approximately 20–30 identical products remain in the lower pile.
No failed grab, dropped product, slipping grip, claw hovering beside the product, visible contact gaps, claw passing through the packaging, or unsupported floating product.
No thickening claw arms, oversized mechanism, swollen tubes, chunky gripping pads, or changing claw geometry.
No sideways claw travel, diagonal lift, circular movement, orbiting, forward-and-backward movement, depth rotation, product flipping, excessive swinging, spinning, or uncontrolled bouncing.
No camera zoom, camera movement, changing composition, lighting changes, exposure changes, background changes, or scene cuts.
No product deformation, cap detachment, opening packaging, spills, liquid movement, inconsistent sizes, duplicated hero products, malformed containers, altered fill levels, or fused products.
No warped logo, misspelled text, pseudo-text, mirrored typography, floating letters, label drift, texture crawling, invented packaging details, or logos printed on the wrong surface.
No title, headline, caption, subtitle, promotional copy, CTA, interface element, badge, border, added logo, signature, or watermark. Preserve only the text physically printed on the product packaging.
No hands, people, faces, unrelated prizes, unrelated props, dialogue, voice-over, or audio. Silent video.
원문 작성자: ai_freaks.kr · 출처 페이지 · 2026-08-18 확인
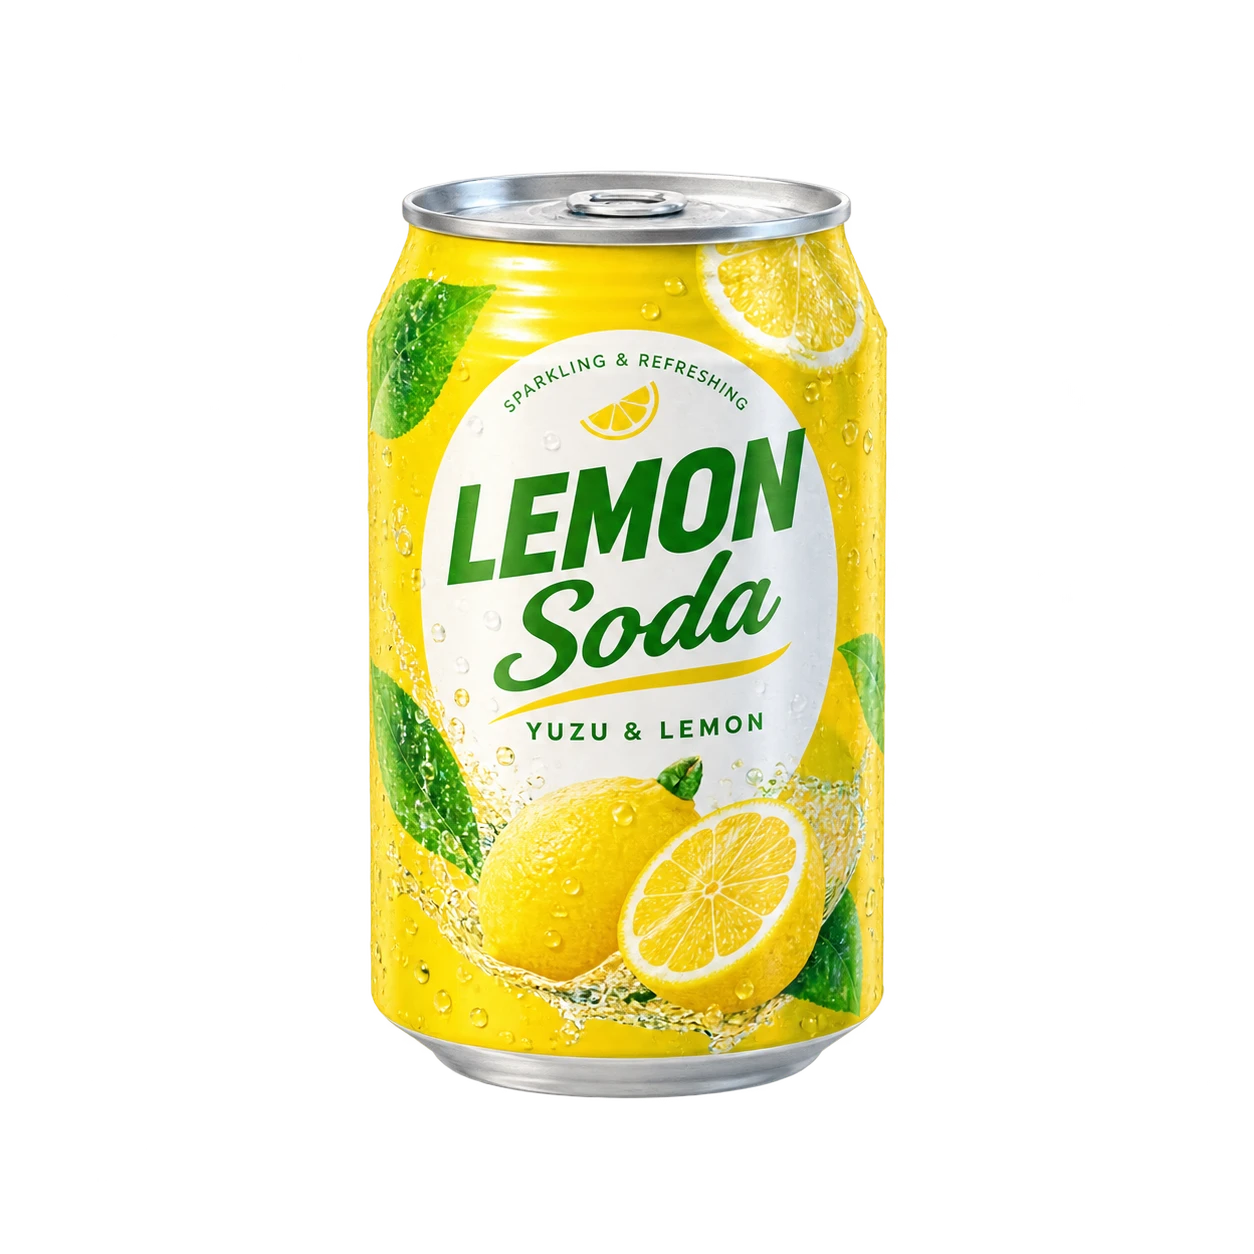
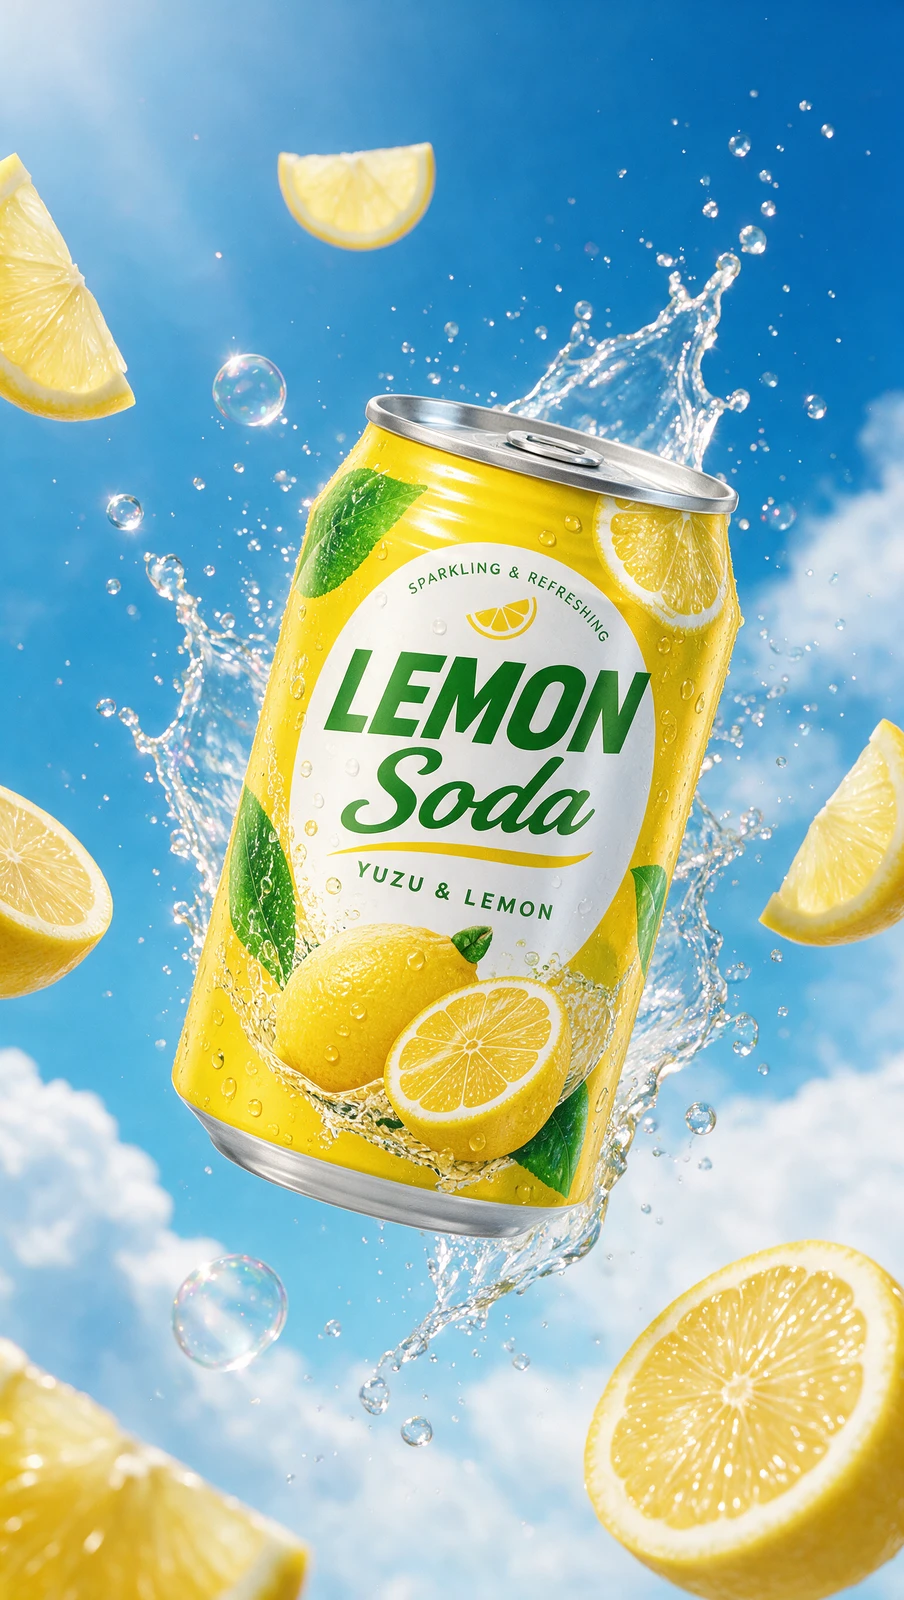
03. 레몬소다 · 효과가 퍼졌다가 가라앉는 움직임
레몬소다 캔을 하늘과 물보라 장면에 놓고 물과 레몬 조각이 짧게 퍼진 뒤 화면 밖으로 빠져나가도록 합니다. 원문 비율은 9:16이며 입력 이미지, 생성 이미지, 결과 영상 순서로 확인합니다.
이미지 프롬프트 원문 보기 · 11,494자
Using <<image1>> as the sole and absolute product reference, create a bright, energetic, premium photorealistic CGI product advertising still in vertical 9:16.
Create one hero product floating dynamically in front of a vivid blue summer sky, surrounded by a refreshing burst of crystal-clear water droplets, sparkling bubbles, soft white clouds, and a restrained arrangement of ingredient or flavor elements accurately derived from <<image1>>.
The final image should feel fresh, juicy, effervescent, sunlit, playful, and premium, with a polished high-end beverage campaign finish.
PRODUCT REFERENCE:
Identify the single main product in <<image1>> and reproduce it accurately.
Preserve its exact:
Silhouette and physical proportions.
Container, bottle, can, tube, pouch, box, or packaging structure.
Cap, lid, pump, tab, nozzle, closure, or attached component.
Materials, transparency, opacity, metallic finish, and surface texture.
Original product colors and color relationships.
Logo, brand name, typography, label layout, illustrations, and printed details.
Product volume, fill level, seams, edges, embossing, and reflections.
If <<image1>> contains multiple products or multiple angles, select only the clearest front-facing product and generate exactly one hero product.
Do not redesign, simplify, recolor, or reinterpret the packaging.
HERO PRODUCT COMPOSITION:
Place the hero product prominently in the center of the vertical frame, occupying approximately 58–65% of the total frame height.
Tilt the product approximately 6–10 degrees counterclockwise from vertical. The tilt should feel energetic but controlled.
Keep the main branding surface facing almost directly toward the camera. Use only a very slight three-quarter perspective to reveal the product’s physical volume.
Position the product slightly above the vertical center so the lower portion remains surrounded by water droplets and ingredient elements.
Keep the complete silhouette visible with comfortable separation from the frame edges. Do not crop the main product.
The product must appear suspended in midair with believable weight, not standing on a surface and not floating randomly without visual support.
SKY BACKGROUND:
Create a vivid, luminous, high-key summer sky behind the product.
Use:
A rich clear blue sky.
A slightly lighter cyan-blue area near the center.
Soft fluffy white cumulus clouds.
Gentle atmospheric depth.
Bright sunlight from the upper-left or upper-front.
Clean open space immediately behind the product.
The clouds should form soft diagonal masses around the outer edges while leaving the central product silhouette clearly separated.
Keep the sky saturated, fresh, and cheerful without becoming neon, dark navy, gray, stormy, or artificial.
Do not create a visible horizon, landscape, buildings, beach, sea, ground, table, or studio wall.
PRODUCT–BACKGROUND CONTRAST:
Preserve the exact product colors from <<image1>>.
If the product is predominantly blue, place lighter cyan sky and white clouds immediately behind its silhouette for separation.
If the product is light-colored, use a richer blue area behind it.
If the product uses warm colors, retain the blue-sky background and use soft complementary reflections without recoloring the packaging.
Ensure the product remains the darkest and most visually defined central subject without becoming underexposed.
INGREDIENT AND FLAVOR DETECTION:
Inspect <<image1>> for clearly identifiable flavor, fragrance, botanical, or ingredient information.
Use an ingredient element only when it is explicitly indicated by at least one of the following:
A clearly recognizable ingredient illustration printed on the package.
A readable flavor or ingredient name.
A visible photograph of the ingredient.
An unmistakable product variant associated with a specific ingredient.
When a specific ingredient is clearly identified, surround the product with approximately five to seven fresh pieces of that ingredient.
Examples include:
Lemon wedges or lemon slices for a clearly identified lemon product.
Orange segments for an orange product.
Lime wedges for a lime product.
Berry pieces for a berry product.
Peach slices for a peach product.
Flower petals for a floral product.
Green leaves for a botanical or herbal product.
Do not invent a flavor or ingredient that is not supported by <<image1>>.
If no specific ingredient can be identified confidently, omit fruit and botanical props completely. Replace them with additional clear bubbles, colorless droplets, and a few translucent product-color light accents.
INGREDIENT ARRANGEMENT:
When ingredients are used, arrange approximately five to seven pieces around the product:
One medium piece entering from the upper-left edge.
One smaller piece near the upper-center edge.
One piece entering from the middle-left edge.
One medium piece floating near the middle-right.
One larger foreground piece near the lower-right.
One partially cropped piece near the lower-left.
Optionally one small distant piece near the top.
Use varied sizes, rotations, distances, and depth-of-field levels.
Keep the pieces away from the central logo. Do not allow fruit, leaves, or petals to cover essential packaging information.
The ingredients must look freshly cut, moist, translucent, and naturally lit. Preserve realistic pulp, peel, fibers, veins, juice, and surface moisture.
Do not generate excessive ingredient quantities or create a symmetrical decorative ring.
WATER-BURST DESIGN:
Create a refreshing burst of colorless, crystal-clear water behind and around the product.
The water action should originate from behind the lower-middle portion of the product and spread diagonally upward and outward.
Use:
Hundreds of tiny sparkling microdroplets.
Twenty to thirty small or medium suspended droplets.
Five to eight larger transparent bubbles.
Several delicate water trails.
A soft fragmented splash sheet behind the product.
Tiny droplets clinging naturally to the packaging surface.
The splash must frame the hero product rather than cover it.
Keep the largest splash mass behind the product. Place individual droplets in front only around unprinted edges and empty packaging areas.
Do not cover the logo, brand name, flavor name, or essential printed details with water.
NATURAL CLEAR-WATER APPEARANCE:
The water must look optically clear, colorless, lightweight, and freshly splashed.
Use:
Clean white specular highlights.
Transparent interiors.
Very faint sky-blue refraction caused only by the background.
Bright open shadows.
Realistic surface tension.
Natural irregular droplet shapes.
Soft optical distortion.
The water itself must not be blue liquid, gray liquid, metallic liquid, gel, glass, or acrylic.
Avoid black reflections, gray edges, silver streaks, chrome-like droplets, smoky transparency, or thick sculptural water forms.
SPARKLING BUBBLES:
Add five to eight larger transparent bubbles distributed around the outer composition.
These bubbles should have:
Extremely thin transparent membranes.
Subtle rainbow iridescence.
Pale cyan and pink edge reflections.
Transparent centers.
Soft white highlights.
Slightly imperfect spherical shapes.
Use varied sizes. Keep some bubbles sharply focused and others gently blurred through depth.
The bubbles must not look like solid glass balls, plastic ornaments, pearls, gemstones, or metallic spheres.
PRODUCT-SURFACE CONDENSATION:
Add a restrained coating of fresh condensation to suitable product materials.
Use many tiny droplets and only a few medium droplets. Keep the central logo and small typography mostly clear.
Condensation should naturally collect around:
Upper packaging edges.
Side contours.
Metallic seams.
Lower curved edges.
Corners and recessed areas.
Do not cover paper, cardboard, or other materials that would not realistically hold condensation unless <<image1>> clearly depicts moisture-resistant packaging.
The condensation must enhance freshness without making the product dirty, frosted, or unreadable.
DYNAMIC DEPTH:
Create strong foreground, midground, and background depth.
Use:
The hero product in the sharp midground.
One or two larger ingredient pieces or bubbles in the near foreground.
A concentrated microdroplet field behind the product.
Small distant bubbles near the clouds.
Selectively defocused foreground elements near the frame edges.
Keep the product face, logo, and main packaging details sharply focused.
Use tasteful depth of field. Do not blur the product label.
LIGHTING:
Use bright, premium, sunlit commercial lighting.
Illuminate the product with:
A strong broad sunlight key from the upper-left.
A large neutral-white frontal beauty fill.
Soft cyan sky fill from both sides.
A gentle white rim light around the product silhouette.
A bright lower-front bounce.
Small controlled highlights on droplets and wet ingredients.
Natural light transmission through fruit flesh and transparent packaging.
Keep the product approximately 10–15% brighter than the sky directly behind it.
Use crisp but controlled specular highlights, luminous midtones, open shadows, and a clean high-key exposure.
Prevent dark sides, crushed shadows, heavy contrast, blown-out logos, or unreadable packaging.
COLOR GRADE:
Use a fresh summer campaign grade with:
Clear sky blue.
Clean white clouds.
Exact product colors from <<image1>>.
Bright natural ingredient colors.
Colorless transparent water.
Subtle prismatic bubble highlights.
Neutral-to-slightly-warm sunlight.
Crisp whites and open shadows.
Do not apply a global blue filter over the product or ingredients.
Do not shift the product’s original hue, saturation, or brand colors.
CAMERA:
Use a centered commercial product camera with a moderate telephoto focal length and a slightly low viewing angle.
Show a small amount of the product’s upper surface or cap where physically appropriate, while keeping the main branding face dominant.
Avoid wide-angle distortion, fisheye perspective, exaggerated tapering, or extreme three-quarter rotation.
Use high-speed advertising photography aesthetics with sharply frozen droplets and natural motion energy.
Premium photorealistic CGI, high-end beverage and lifestyle advertising, realistic liquid simulation, refined condensation, fresh ingredient detail, controlled depth of field, and clean 4K resolution.
HARD CONSTRAINTS:
Exactly one hero product.
No duplicate products, additional packaging, alternate variants, detached caps, separated tabs, extra containers, or floating packaging components.
Use ingredients only when clearly supported by <<image1>>. Do not invent unsupported fruit, flavors, flowers, or botanicals.
No product deformation, bending, denting, melting, inflation, incorrect proportions, changed closure, modified packaging structure, incorrect fill level, or altered surface material.
No warped label, misspelled logo, scrambled text, mirrored typography, invented branding, label drift, texture crawling, floating letters, or illegible main packaging details.
No water covering the main logo or essential label text.
No gray water, metallic droplets, chrome bubbles, thick gel, slime, foam, milk, smoke, fog, dirty water, or storm clouds.
No title, headline, caption, subtitle, percentage, promotional copy, CTA, interface element, badge, border, added logo, signature, or watermark.
Preserve only the original text and branding physically printed, embossed, engraved, or attached to the product in <<image1>>.
No hands, people, faces, animals, buildings, landscape, beach, ground, table, or unrelated props.
영상 프롬프트 원문 보기 · 7,967자
Create an exact 5.0-second premium photorealistic CGI product animation in vertical 9:16 for Seedance 2.5, using <<image1>> as the visual reference for the hero product and peak splash composition.
MOTION STYLE:
Use restrained, simple, clean commercial motion.
The animation consists of one brief water-and-ingredient burst behind the product, followed by a natural outward dispersal. Keep the action elegant and relatively small.
Do not create a massive explosion, violent impact, dramatic product movement, complicated orbit, or exaggerated slow motion.
The product remains almost stationary while the water, bubbles, droplets, and ingredients provide the motion.
EXACT DURATION:
The video duration must be exactly 5.0 seconds.
The calm opening and calm closing compositions should look nearly identical so the video can loop cleanly.
TIMELINE:
0.0–0.4 seconds — CALM PRODUCT:
Begin with the hero product already centered against the bright sky and clouds.
The product is in the same position, scale, angle, lighting, and perspective shown in <<image1>>.
No large splash or ingredient pieces are visible yet. Show only a few tiny condensation droplets attached to the product.
Keep the shot clean and still.
0.4–0.8 seconds — QUICK SPLASH APPEARS:
A moderate burst of crystal-clear water appears quickly from directly behind the product.
Several ingredient pieces enter naturally from behind the product and nearby frame edges.
The splash opens outward in one simple movement. Use a thin, transparent water sheet with small droplets rather than a huge heavy wall of water.
The product reacts with only an extremely small upward movement of less than 0.5% of frame height and a rotational change of less than 0.5 degrees.
0.8–1.5 seconds — PEAK MOMENT:
The water, bubbles, and ingredients reach their most abundant arrangement.
Match the general composition of <<image1>>:
Hero product centered and front-facing.
Water framing the product from behind.
Ingredient pieces distributed around the outer edges.
Clear bubbles and microdroplets around the product.
Bright blue sky and soft white clouds.
Product logo completely visible.
Keep the peak splash controlled and refined. Do not cover the product with water or ingredients.
1.5–2.5 seconds — NATURAL OUTWARD DISPERSAL:
The water sheet breaks naturally into smaller droplets.
All droplets continue moving outward, upward, sideways, or diagonally downward under gravity.
Ingredient pieces continue along short forward arcs toward the outer frame edges.
Large bubbles drift upward. Small droplets gradually spread apart.
Nothing reverses direction or returns toward the product.
2.5–3.3 seconds — ELEMENTS CLEAR:
Most ingredient pieces leave through the nearest top, side, or bottom edge.
The remaining water droplets become smaller and continue traveling outward.
Only a thin field of microdroplets and two or three bubbles remain around the product.
The product gently returns to its exact initial position.
3.3–4.0 seconds — SOFT FINISH:
The final microdroplets drift outside the frame or fade naturally through distance.
The last bubbles rise through the upper edge.
Do not make the water shrink, contract, rewind, or get pulled back into the product.
4.0–5.0 seconds — CALM HOLD:
Hold a clean hero-product shot for the final second.
The product remains centered and still against the unchanged sky and clouds.
No large water splash, fruit, or foreground bubble remains.
At 5.0 seconds, the visible composition matches the calm opening frame as closely as possible.
HERO PRODUCT:
Preserve the exact hero product from <<image1>>.
Maintain its exact:
Shape and proportions.
Packaging structure.
Cap, lid, tab, pump, closure, or attached component.
Materials and surface finish.
Original colors.
Logo, label, typography, and printed illustrations.
Condensation and product details.
The product remains one sealed, rigid, undeformed object.
Keep its main branding surface facing the camera throughout.
Maximum product motion:
Vertical movement: less than 0.5% of frame height.
Horizontal movement: less than 0.2% of frame width.
Rotation: less than ±0.5 degrees.
Scale change: none.
Depth-axis movement: none.
No spinning, swinging, wobbling, floating orbit, bending, morphing, or dramatic recoil.
WATER:
Use a restrained, medium-sized splash originating directly behind the product.
The splash should contain:
One thin fragmented water sheet.
Many tiny microdroplets.
Ten to fifteen small droplets.
Five to eight medium droplets.
Three to five transparent bubbles.
A few narrow water trails.
Use clear, colorless water with clean white highlights and subtle sky-colored refraction.
The water moves outward once and then leaves the frame.
After the peak, the splash must break apart rather than contract into a smaller centered splash.
No reverse playback, rewind, suction, implosion, boomerang motion, or water returning toward the product.
INGREDIENTS:
Use only the ingredient or flavor elements shown in <<image1>>.
Keep the quantity restrained, approximately five to seven visible pieces at the peak.
Each ingredient enters quickly, follows one short natural forward arc, and exits through the nearest frame edge.
Use only small rotations of approximately 3–6 degrees.
Do not make the ingredients orbit around the product or return behind it.
No collision with the product, logo coverage, morphing, duplication, splitting, or size changes.
BUBBLES AND DROPLETS:
Large bubbles move slowly upward and exit through the top.
Small droplets move faster and travel outward in different directions.
Tiny microdroplets remain visible briefly, then disappear through distance or leave the frame.
Keep all paths simple and physically plausible.
Do not make bubbles pop, multiply, merge, reverse, or behave like solid glass balls.
CAMERA:
Use a completely locked camera for the entire five seconds.
No zoom, push-in, pull-out, pan, tilt, roll, dolly, orbit, shake, reframing, lens breathing, focal-length change, or perspective change.
The product must remain the same size in the frame throughout.
SKY AND CLOUDS:
Keep the sky and clouds nearly static.
Allow only an imperceptible cloud drift of less than 0.2% of frame width.
Do not change the sky color, weather, cloud density, or background composition.
LIGHTING:
Preserve the bright, high-key summer lighting of <<image1>>.
Allow small natural highlights to move across water droplets, bubbles, condensation, and wet ingredient surfaces.
Keep product exposure, product color, sky brightness, saturation, and white balance constant.
No impact flash, flicker, lighting pulse, exposure pumping, color shift, or darkening.
FOCUS:
Keep the hero product and logo sharply focused throughout.
Use restrained motion blur only on the fastest droplets and ingredient edges.
No focus pull, focus breathing, or focus hunting.
HARD CONSTRAINTS:
Exact duration: 5.0 seconds.
One short restrained splash only.
Exactly one hero product.
The product remains almost completely stationary, rigid, intact, sealed, and front-facing.
No exaggerated explosion, giant splash, heavy liquid wall, aggressive recoil, dramatic slow motion, or chaotic particle storm.
No water contraction, reverse splash, rewind, suction, implosion, returning droplets, or ingredients moving back toward the product.
No camera movement, zoom, shake, reframing, perspective change, or scene cut.
No product deformation, size change, spinning, bending, melting, cap detachment, opening, or leakage.
No warped label, misspelled logo, scrambled typography, altered branding, label drift, texture crawling, or unreadable packaging.
No gray water, metallic droplets, chrome bubbles, gel, foam, slime, milk, smoke, fog, or cloudy liquid.
No title, headline, caption, subtitle, promotional copy, CTA, interface element, badge, border, added logo, signature, or watermark. Preserve only text physically printed on the product.
No people, hands, faces, animals, unrelated props, dialogue, voice-over, or audio. Silent video.
원문 작성자: ai_freaks.kr · 출처 페이지 · 2026-08-18 확인
04. 해변 가방 · 제품을 고정하고 주변만 움직이기
갈색 가방을 미니어처 해변에 놓은 뒤 가방과 카메라는 고정하고 물결과 배와 사람의 작은 움직임만 허용합니다. 원문 비율은 4:3이며 입력 이미지, 생성 이미지, 결과 영상 순서로 확인합니다.
이미지 프롬프트 원문 보기 · 15,866자
Create a vertical 4:3 photorealistic luxury advertising image using the single main object shown in the uploaded image.
NON-NEGOTIABLE ORIENTATION
The hero object must lean backward, away from the camera.
“Backward” has one precise spatial meaning:
The bottom-front edge of the object is the closest part to the camera
The object’s upper body, opening, and handle move progressively farther away from the camera
The topmost point must sit noticeably behind the base in three-dimensional space
The rear lower edge must settle deeper into the sand than the front lower edge
The object must look as if its weight is resting backward into the beach
The object must never lean toward the camera. The top must not project forward over the base.
Use the uploaded image only to preserve the object’s identity, proportions, color, material, and construction. Do not preserve its original camera angle or frontal pose.
Reconstruct the object as a believable three-dimensional form and deliberately place it in a new pose.
The final pose must combine:
A clear three-quarter horizontal rotation
A definite backward lean away from the camera
A very subtle sideways lean
Uneven burial, with the rear base deeper than the front base
A front-heavy, forward-leaning, top-down, perfectly upright, or straight-on result is unacceptable.
OBJECT IDENTITY
Identify and isolate only the main object from the uploaded image. Completely remove its original background.
Preserve:
Exact product silhouette and overall proportions
Original color and tonal variation
Authentic material and surface texture
Weave, grain, stitching, seams, and patterns
Handles, straps, openings, edges, and hardware
Correct logo design, size, and placement
All distinctive structural details
Do not redesign, simplify, inflate, stretch, compress, mirror, or duplicate the object. Do not add or remove handles, straps, decorations, hardware, openings, or structural elements.
Preserve the design, but generate a new three-dimensional viewing angle and physical orientation.
MANDATORY THREE-QUARTER ROTATION
Rotate the object approximately 25–30 degrees around its vertical axis.
Place the left-front portion slightly closer to the camera and let the right portion recede deeper into the scene. The main front surface must angle backward toward the right instead of remaining parallel to the image plane.
The object’s horizontal axis should travel from the lower-left foreground toward the upper-right background.
Make this perspective physically visible:
One side surface must occupy approximately 18–25% of the apparent width
The nearer edge should appear slightly larger than the farther edge
Surface patterns and seams must converge naturally in perspective
The handle and opening must show believable three-dimensional depth
Corresponding left and right details must not appear perfectly symmetrical
The object must never resemble a flat frontal cutout
Do not rely only on shadows to create this angle. The silhouette and geometry must clearly show the horizontal rotation.
MANDATORY BACKWARD LEAN — HIGHEST PRIORITY
Tilt the entire object backward, away from the camera, by approximately 10–14 degrees around its horizontal left-to-right axis.
This backward pitch must be clearly visible.
Move the upper third of the object, including the top edge, opening, and handle, approximately 5–8% of the object’s apparent height toward the background relative to the base.
The front lower body must remain closer to the camera. As the object rises, its surface must recede gradually away from the viewer.
The visual perspective must communicate:
The lower front surface is closest to the lens
The central front surface recedes slightly
The upper rim or opening recedes more noticeably
The top of the handle is the farthest major point from the lens
The rear side carries more of the object’s weight
The object rests securely against compressed sand behind it
For an object with an opening, show only a narrow, controlled glimpse of the interior. The camera must not look deeply down into the opening. Excessive visibility of the inside makes the object appear tipped forward and is forbidden.
The upper rim should partially obscure the interior rather than exposing it fully. The back rim may sit slightly higher in the image, while the top structure visibly recedes away from the camera.
The object must feel like it has been gently pushed backward and allowed to settle into the soft sand.
Do not tilt the top toward the lens. Do not let the handle arch project forward. Do not let the upper body visually overhang the bottom-front edge.
SUBTLE SIDEWAYS LEAN
In addition to the backward lean, apply only a mild 3–5 degree clockwise sideways lean.
The right side may sit slightly lower than the left, but this sideways angle must remain secondary. The primary and most obvious tilt must be backward, away from the camera.
Do not use a strong 7–10 degree sideways rotation. Avoid making the object appear as if it is falling sideways.
Keep the camera horizon, shoreline, sandstone pillars, and background architecture perfectly level. Only the object should be physically tilted.
REAR-WEIGHTED SAND BURIAL — CRITICAL
Partially bury the object in fine, soft beach sand so that its rear edge is noticeably deeper than its front edge.
The burial must support and explain the backward-leaning pose.
Depth distribution:
Front lower edge: approximately 4–6% buried
Rear lower edge: approximately 9–12% buried
Right-rear corner: up to 12–13% buried
Left-front corner: remain the most visible and least buried area
Create a sloped depression underneath the object. The sand bed should descend gently from the exposed front edge toward the deeper rear edge.
The bottom-front edge should remain partially visible and visually closest to the camera. The rear bottom edge should disappear more substantially beneath the sand.
Add:
A thin, irregular layer of sand overlapping the front lower edge
A deeper compressed pocket beneath the rear side
A higher ridge of displaced sand immediately behind the object
Slightly more accumulated sand around the rear-right corner
A smaller amount of loose sand around the front-left corner
Fine grains touching the object’s lowest surface
A soft front contact shadow
A broader, diffused shadow extending behind and toward the lower right
The rear sand ridge should act like a subtle physical support or cushion. It must make the backward lean believable without looking like a separate mound.
Do not surround the whole object with a uniform circular pile. Do not create an even horizontal burial line. Do not bury the front more deeply than the back.
Do not bury more than 13% of the object. Do not cover the logo or important design details. Do not melt, squash, warp, or deform the base.
If the object has a loose strap, cord, chain, or flexible attachment, allow it to fall naturally according to gravity. A small section may rest on or become lightly covered by sand. Do not change its length, construction, or design.
CORE SCENE
Transform the object into an enormous monumental installation on a serene miniature Mediterranean beach.
The object should appear several stories tall compared with the tiny vacationers while retaining authentic proportions and materials.
The scene must resemble a meticulously handcrafted tabletop miniature diorama photographed for a premium fashion advertising campaign.
The mood should be elegant, warm, playful, tactile, editorial, quiet, and subtly surreal.
Do not create a realistic full-scale canyon, dramatic travel photograph, epic fantasy landscape, or rugged adventure scene.
CANVAS AND COMPOSITION
Use a portrait-oriented vertical 4:5 aspect ratio. Do not generate a horizontal or panoramic image.
Build the scene in five clear layers:
Calm turquoise water in the lower foreground
One genuinely tiny white sailboat near the lower-left edge
A narrow strip of pale sandy beach
The monumental backward-leaning object in the middle ground
Softly blurred sandstone structures in the background
Place the object slightly right of center. It should occupy approximately:
48–55% of the canvas width
28–34% of the canvas height
Leave comfortable negative space above and around the object. Do not crop any important part.
Avoid rigid central symmetry. Use the three-quarter rotation, backward lean, curved shoreline, and tiny sailboat to create a balanced but naturally asymmetrical editorial composition.
CAMERA POSITION — CRITICAL
Use a camera positioned at approximately 30–40% of the hero object’s total height.
The lens should be close to the miniature beachgoers’ eye level, slightly above the water, but not elevated enough to look down into the object.
Use a nearly level optical axis with no more than 2–3 degrees of downward camera pitch.
The camera should see the object from the front and slightly from the side—not from above.
The interior or top surface must occupy only a small visual area. The front exterior surface should remain dominant.
Use:
Vertical 4:5 portrait composition
Approximately 75–90 mm lens perspective
A level horizon
Mild perspective compression
A clear three-quarter product view
Subtle macro depth of field
Gentle tilt-shift miniature effect
Smooth, creamy bokeh
No wide-angle distortion
Do not use a high camera angle. Do not use a bird’s-eye perspective. Do not aim the camera downward toward the opening. Do not reveal a large interior cavity.
BEACH AND WATER
Create a refined beach made from smooth, fine, pale ivory-beige sand.
The sand should have a soft miniature texture with delicate grains, subtle undulations, and restrained footprints.
Avoid coarse gravel, dirty sand, oversized grains, deep footprints, or chaotic texture.
Place calm, transparent dusty-turquoise water across the lower foreground. Let the shoreline curve gently from the lower left toward the center-right.
The water should be shallow, clear, softly rippled, and luminous, with delicate creamy-white sunlight reflections.
Avoid dark blue water, large waves, dramatic splashes, stormy conditions, or intense reflections.
TINY SAILBOAT
Add exactly one very small white sailboat near the lower-left edge of the water.
Strict size limits:
The entire boat, including the sails, must occupy no more than 8–10% of the canvas width
Its total height must occupy no more than 14% of the canvas height
Its hull should be approximately one-sixth of the hero object’s visible width
Use a slim white hull and two simple, narrow, off-white triangular sails. Angle it gently toward the beach and render it slightly softer than the object.
The boat must remain a minor scale cue. It must not dominate the foreground, reach toward the center, or overlap the object.
MINIATURE PEOPLE
Add only 8–12 miniature vacationers:
Two or three people relaxing on muted pastel towels
Two people standing or walking near the shoreline
Three or four people swimming or floating in the water
One or two people standing near the monumental object
All people must be approximately 1/30 to 1/40 of the object’s height.
Use relaxed, candid poses and muted pastel colors. Leave generous empty areas between groups.
Do not create a crowded beach, repeated figures, giant people, prominent faces, or distorted anatomy.
BACKGROUND SANDSTONE SET
Create a spacious background using a few monumental sandstone walls, rectangular pillars, and softly sculpted architectural formations.
The structures should resemble refined handcrafted set pieces made from matte plaster or very fine pale sandstone.
Use:
Broad, clean vertical planes
Large simplified architectural shapes
Softly rounded edges
Very shallow erosion
Restrained sediment lines
Pale warm beige and muted honey tones
Soft atmospheric blur
Place the structures well behind the object. Show bright atmospheric gaps between them so the scene feels open and breathable.
Do not create a narrow canyon, enormous nearby walls, jagged peaks, sharp spikes, porous surfaces, deep holes, dense cracks, coral-like formations, grotesque organic textures, facial shapes, or cave interiors.
HANDCRAFTED MINIATURE AESTHETIC
The scene must look like a carefully constructed tabletop miniature set photographed for a luxury fashion advertisement.
Use simplified scenery, tactile physical materials, clean shapes, restrained details, carefully positioned tiny figures, and an elegant sense of artificial scale.
The result should feel warm, charming, refined, calm, aspirational, and slightly surreal.
It must not look like a real full-scale landscape, documentary travel photography, epic cinematic scenery, rugged geology, a cartoon, or a plastic toy set.
COLOR PALETTE
Use a soft, creamy palette dominated by:
Warm pale sand
Ivory and muted honey-beige sandstone
Soft cream highlights
Desaturated aqua and dusty turquoise water
Muted pastel accents
The object’s original color as the strongest visual accent
Use moderate saturation, low-to-medium contrast, softly lifted shadows, smooth tonal transitions, and creamy highlights.
Avoid crushed blacks, harsh highlights, oversaturation, strong orange casts, teal-and-orange grading, HDR processing, or excessive clarity.
LIGHTING
Use broad, diffused late-afternoon sunlight coming softly from the upper left.
The lighting must reinforce the backward lean:
Illuminate the front lower surface clearly
Allow the upper front surface to become slightly softer and more receded
Create a gentle tonal transition toward the rear
Add a soft shadow where the rear side presses into the sand
Keep the interior or upper opening slightly darker and visually recessed
Prevent the handle or upper body from appearing closer than the base
All elements must share the same light direction, softness, and color temperature. The object must look physically embedded in the environment rather than digitally pasted into it.
FINAL REQUIRED RESULT
A monumental hero object shown from a clear 25–30 degree three-quarter angle, with the left-front portion closer to the camera and the right side receding into the scene.
The bottom-front edge is the nearest part of the object. The entire upper body, opening, and handle lean 10–14 degrees backward, away from the camera. The rear base is buried more deeply than the front base, creating a stable rear-weighted pose.
Only a narrow glimpse of the interior is visible. The object does not project toward the lens. The top sits spatially behind the base. Fine sand partially overlaps the front edge while a slightly deeper compressed pocket supports the rear.
The surrounding scene is a warm handcrafted miniature beach diorama with premium fashion-editorial photography, tiny vacationers, a genuinely small sailboat, calm turquoise water, simplified sandstone structures, creamy sunlight, tactile materials, refined pastel colors, and controlled macro depth of field.
STRICT FAILURE CONDITIONS
Reject and regenerate the image if any of the following occurs:
The top of the object leans toward the camera
The upper body projects in front of the base
The handle appears closer to the lens than the lower front edge
The camera looks deeply into the opening
Too much of the interior or top surface is visible
The front base is buried more deeply than the rear
The object appears front-heavy
The object faces the camera straight-on
The object stands perfectly upright
The front surface is parallel to the image plane
Both sides appear symmetrical
No side surface is visible
The base rests cleanly on top of the sand
The burial line is perfectly horizontal
The object appears to be falling backward rather than securely supported
Also exclude: altered product design, incorrect proportions, added components, duplicated object, warped logo, incorrect material, oversized sailboat, crowded beach, giant people, narrow canyon, jagged or porous cliffs, harsh HDR lighting, obvious CGI, illustration, cartoon styling, plastic toy appearance, and digitally pasted composition.
영상 프롬프트 원문 보기 · 6,614자
Create a 5-second photorealistic image-to-video shot using the uploaded image as the exact first frame.
PRESERVE THE ORIGINAL IMAGE
Maintain the original composition, framing, object design, proportions, colors, lighting, miniature scale, depth of field, and handcrafted diorama aesthetic throughout the entire video.
The monumental hero object must remain completely stationary and structurally unchanged. Preserve its exact silhouette, material, texture, weave, stitching, handles, openings, logo, perspective, tilt, and position in the sand.
The sandstone architecture, beach layout, shoreline, and camera framing must remain fixed.
CAMERA
Use a completely locked-off camera:
No camera movement
No zoom
No pan or tilt
No dolly movement
No handheld shake
No reframing
No focus breathing
No change in focal length
No change in depth of field
The shot should feel like a living miniature display photographed by a stationary macro camera.
WATER AND SMALL WAVES
Animate the turquoise water with very subtle, physically realistic movement.
Create small, slow ripples moving gently toward the shore. A thin miniature wave should softly reach the sand and then recede by only a few centimeters.
Add delicate shifting sunlight reflections on the water surface. Keep the reflections soft, restrained, and consistent with the warm light coming from the upper left.
The water must remain calm and shallow. Do not create large waves, splashes, foam bursts, strong currents, or dramatic ocean movement.
SAILBOAT MOVEMENT
The tiny white sailboat should move very gently with the water.
Let it:
Rock subtly from side to side
Bob vertically by a very small amount
Drift horizontally by no more than 1–2% of the frame width during the entire shot
Rotate by no more than 1–2 degrees
Show a faint, natural flutter in the sails
The boat must stay in the lower-left area and remain the same size. It must not approach the camera, cross the frame, accelerate, or become a focal point.
MINIATURE PEOPLE
Give several miniature people subtle but clearly visible, natural movements. Human activity should be slightly more noticeable than the other ambient motion while remaining realistic and proportional to the miniature scale.
Animate approximately four to six figures at different moments:
One standing person shifts their weight, turns their upper body slightly, and makes a small hand gesture
One beachgoer slowly raises an arm as if waving or pointing, then lowers it naturally
One person takes two or three relaxed steps along the shoreline
One seated person adjusts their posture and briefly moves an arm
Two or three swimmers gently paddle their arms, turn slightly, and rise and fall with the water
A person floating on a tube drifts a few centimeters and makes a small balancing movement
Clothing and hair respond subtly to a light breeze
Stagger and overlap the actions naturally. Two or three figures may move at the same time, but the entire crowd must never move in synchronization. Movements should begin and end at different moments so the beach feels casually active rather than choreographed.
Keep every person close to their original location and at their original scale. Any walking or drifting must cover only a very short distance. Do not add, remove, duplicate, merge, or transform any figures.
SAND AND HERO OBJECT
The hero object must remain heavy, stable, and partially embedded in the sand.
Do not animate the object. Do not let it sway, breathe, bend, inflate, slide, sink farther, or rise from the sand.
The overlapping sand around its lower edge must remain stable. Only allow a few tiny loose grains near the shoreline to react subtly when touched by the smallest wave.
Do not change the object’s shadow or contact with the sand.
LIGHTING
Maintain the same warm, creamy late-afternoon light throughout the shot.
Allow only extremely subtle movement in the water reflections and tiny specular highlights. Keep the illumination on the hero object and sandstone structures stable.
No time-lapse lighting, moving sun, flickering exposure, changing shadows, color shifts, or pulsing brightness.
MOTION STYLE
Use slow, delicate, physically believable ambient motion suitable for a premium luxury fashion advertisement.
The scene should feel quietly alive, with the miniature people providing gentle, clearly perceptible activity while preserving the still-image quality and carefully constructed miniature-diorama composition.
Use smooth motion with natural inertia. No sudden starts or stops. No exaggerated animation. No cartoon motion.
5-SECOND MOTION SEQUENCE
0–1.5 seconds: Small water ripples move toward the beach. Sunlight reflections shimmer softly. The sailboat begins a barely noticeable rocking motion. One standing figure shifts their weight and turns slightly while a nearby swimmer begins gently paddling.
1.5–3.5 seconds: A tiny wave gently reaches and retreats from the shoreline. The sailboat drifts a minimal distance. One person walks two or three slow steps along the shore, another briefly raises an arm, and two or three swimmers move asynchronously in the water. A seated beachgoer subtly adjusts their posture.
3.5–5 seconds: The water continues its calm motion. The sailboat settles slightly in the opposite direction. The walking person slows to a stop, the raised arm lowers naturally, and the swimmers continue gentle, unsynchronized movements until the final frame. End in a stable, natural composition.
STRICT EXCLUSIONS
No movement of the hero object. No product deformation. No morphing. No texture crawling. No changing weave or stitching. No moving handles or straps unless a completely loose strap receives an almost invisible breeze movement. No logo distortion.
No camera movement. No zoom. No parallax shift. No focus change. No scene expansion. No new objects entering the frame.
No large waves. No strong wind. No dramatic sail movement. No fast-moving boat. No energetic splashing. No running, jumping, dancing, exaggerated gestures, or synchronized crowd movement.
No duplicated, disappearing, melting, flickering, or morphing people. No altered anatomy. No changing clothing. No figures sliding across the ground or moving without proper footsteps.
No moving cliffs. No shifting architecture. No breathing rocks. No lighting flicker. No shadow flicker. No color changes. No warped background. No CGI-like motion.
Duration: exactly 5 seconds.
Overall motion intensity: very low.
Human motion intensity: low but clearly visible.
Camera: completely static.
Style: photorealistic handcrafted miniature diorama, subtle ambient animation, premium fashion advertising film.
원문 작성자: ai_freaks.kr · 출처 페이지 · 2026-08-18 확인
01 · 핵심 내용
여기서 쓰는 핵심 용어
여기서 필요한 뜻을 용어집에서 가져와 먼저 보여 줍니다.
프롬프트
AI에게 무엇을 원하는지 글로 적어 전달하는 요청문. 챗봇에서는 요청 문장으로, 이미지·영상 생성 노드에서는 결과물의 재료가 되는 지시문으로 쓰이는 형태.
대상, 수량, 재질, 카메라, 빛, 움직임, 피할 것을 도구에 전달할 때 사용합니다.
용어집에서 자세히 보기참조 이미지
결과물에 유지하고 싶은 인물·스타일·구조를 보여 주려고 함께 연결하는 원본 이미지.
새로 만든 정지 이미지의 대상과 구도를 영상에서도 유지할 때 사용합니다.
용어집에서 자세히 보기이미지에서 영상 만들기
정지 이미지를 첫 화면으로 삼아 카메라나 사물의 움직임을 더하는 생성 방식입니다.
정지 이미지의 사과, 바구니, 천을 유지하면서 5초 움직임을 만들 때 사용합니다.
기준 화면
영상의 시작이나 끝에서 대상의 배치와 형태를 맞출 화면입니다.
첫 장면과 마지막 장면 가운데 어느 화면을 우선해 영상 프롬프트와 검수 기준을 쓸지 정할 때 사용합니다.
노드
frame.md
장면의 순서, 길이, 화면 크기, 움직임을 글로 적는 HyperFrames 편집 지시 문서입니다.
정지 이미지와 5초 영상을 15초 영상으로 묶을 때 사용합니다.
FFmpeg
영상과 소리를 자르고 합치고 변환하는 무료 명령줄 프로그램. subtitles 필터로 SRT 자막을 영상에 입힐 수 있음.
HyperFrames에서 내보낸 영상을 1080×1920 MP4로 맞춰 출력할 때 사용합니다.
용어집에서 자세히 보기FFprobe
영상 파일을 재생하지 않고 길이, 크기, 프레임 속도 같은 정보를 읽는 확인 도구입니다.
최종 영상이 수업의 출력 기준과 맞는지 확인할 때 사용합니다.
02 · 결과 확인
결과를 확인합니다
완료 표시가 아니라, 화면이나 파일에서 직접 확인할 수 있는 결과입니다.
- 레퍼런스를 장면, 구도, 재질, 조명, 색, 스타일, 촬영, 경계로 나누고 관찰·추론·선택을 구분했습니다.
- 참조 자료와 달라지는 대상 수, 용기 형태, 천의 접힘, 카메라, 빛 가운데 세 가지 이상을 정했습니다.
- 네 가지 움직임 설계법 가운데 하나를 고르고 기준 화면과 주된 움직임 및 끝 상태를 적었습니다.
- 정지 이미지 프롬프트에 장면, 구도, 재질, 조명, 색, 스타일, 촬영, 경계가 들어 있습니다.
- 생성 전 건수, 예상 비용, 누적 비용, 잔액을 확인하고 승인받았습니다.
- 세로형 정지 이미지 한 장과 같은 대상을 유지한 5초 영상 한 개가 있습니다.
- 5초 영상의 시작·중간·끝 화면을 계획표의 검수 기준과 비교했습니다.
- 실제 샘플에서 초록 사과 5개와 바구니 형태가 영상 끝까지 유지됐습니다.
- 15초 MP4 영상에 제목, 생성 영상, 정지 이미지, 작업 기록이 순서대로 보입니다.
- FFprobe 결과에서 1080×1920 크기, 초당 30프레임, 약 15초 길이를 확인했습니다.
- 사용한 도구, 모델, 생성 건수, 예상 비용, 실제 비용을 기록했습니다.
- 원본 이미지, 결과 영상과 원문 프롬프트를 같은 세트로 비교하고 작성자와 출처를 확인했습니다.
03 · 참고 자료